Freezing Milk

December 12, 2008


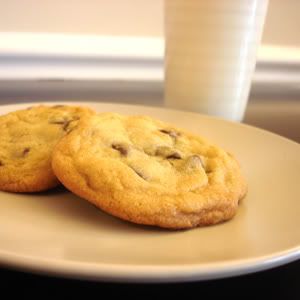
Many people ask (and I have wondered myself) can you freeze a gallon of milk? Will the taste or texture suffer after being defrosted?

I tried freezing a gallon of milk this past week and here are the initial results.

My experiment was done with a gallon of 2% milk.

When it was time to thaw, I left it on the counter overnight and by morning it was still slightly icy in the middle and cold enough to remain at a safe temperature so as to not spoil at room temp. I shook it firmly and stored it in the fridge.

We drank it straight this evening with dinner and it tasted completely fine. There was no detectable difference except that it acted a bit more like 1% milk in taste and thickness. I assume this means that the ice crystals which formed while freezing became mixed with the milk when it thawed.

We don't drink whole/full fat milk, but I would assume, based on my freezing of other various dairy products that the higher fat content could cause separation of the milk fat solids and graininess. If anyone has tried this, please let me know if it worked.

All in all, I would do this again with 2% or lower fat milk in a heartbeat, especially over a holiday weekend when a trip to the grocery store can take three times as long because of long lines and traffic.


Read more...

Butternut Bisque

December 8, 2008

Sorry it's been a while since I posted. Our little family has been sickity-sick so far this December.

I return to you with a simple recipe by Martha Stewart for Butternut Bisque. Fancy Schmancy enough for company and your guests won't need to know that you whipped up this elegant autumnal soup in the blender and then stashed it in the freezer.

BUTTERNUT BISQUE

3 T. butter
1/2 diced yellow onion
2 cloves (or 2 tsp.) minced garlic
1/2 tsp. dried thyme
1/4 tsp. cinnamon
1/8 tsp. cayenne pepper
1 large butternut squash (4 lbs), peeled, seeded and cut into 1 inch cubes.
1 can reduced sodium chicken broth
1 c. half and half
salt to taste

1. In a large saucepan, heat butter over medium heat. Add onions, garlic, thyme, cinnamon and cayenne. Saute for 5 minutes.
2. Add squash, broth, half-and-half and 3 cups water. Bring to a boil. Reduce to a simmer and cook until squash is tender, about 20 minutes.
3. Working in patched, puree in a blender until smooth. Season with salt to taste.

To Freeze: Ladle into airtight containers. Label and freeze for up to 3 months.

To Serve: Heat in microwave on high for 1 minute intervals, stirring after each minute. When warmed through top with sour cream and a dash of cayenne pepper.

Read more...

Thanksgiving Casserole

November 28, 2008

Thanksgiving is here and that means food, football and leftovers. Each year after Thanksgiving we make Kentucky Hotbrowns with some of our leftovers, but inevitably, we're still eating leftovers a week later. Now you can make those leftovers into a quick, easy and yummy freezer meal that combines all of the goodness of Thanksgiving dinner, but you can eat it after the Holidays!


Thanksgiving Casserole


3 c. diced turkey meat
1 can cream of mushroom soup
1/3 c. sour cream
1/2 c. diced onions
1 tsp. minced garlic
1/3 c. frozen peas (unthawed)

3 c. prepared stuffing
(or 1 box prepared Chicken StoveTop stuffing)


To prepare:
- Combine all ingredients except stuffing.
- Place in 8x8" disposable aluminum pan.
- Top with stuffing
- Label and seal with aluminum foil.


To cook:
- Thaw in refridgerator for 24 hours.
- Remove foil and bake at 350* for 35-45 minutes until bubbly.

Read more...

Hearty Beef Stew

November 25, 2008

Every October my little family hosts a Pumpkin Carving Party and it has become a tradition to have this Hearty Beef Stew on that occasion each year. That's fine by me because this stew is easy as pie and cooks in a crock-pot on my counter all day while I get ready for the party. And this Beef Stew freezes really well. Divide it and freeze in single portions for a slow cooked taste of home in a snap.

Hearty Beef Stew


1 ½-2 lbs. stewing beef
2 cans tomato soup
4-5 potatoes
1 can beef broth
1 medium onion
½ lb. baby carrots
3 bay leaves
3-4 cloves garlic

1 pkg. beef stew seasoning
2 Tbsp. fresh flat leaf parsley
salt & pepper to taste

-Combine everything through the garlic in a 4 qt. Crockpot.
-Cook on High for 5 hours.
- remove bay leaves.
-Make a slurry* with seasoning packet and cold water. Add and bring to boil to thicken.
-Add salt and pepper to taste.
-Sprinkle top with fresh chopped italian parsley right before serving


To Freeze: Coll, uncovered in the refrigerator. Spoon into individual disposable soup bowls. Cover tightly with lid. Label and freeze for up to 6 months.

To Re-heat: Open one edge of lid to vent. Cook in microwave on high for 2 minutes. Stir. Continue cooking in two minute intervals (stirring in between) until desired temperature.


*A slurry is when you take a thickening agent like flour or cornstarch and whisk it together with cold water to make a thick paste. It is then added it to a hot liquid. Adding a thickening agent to hot liquid without this will create lumps. Be sure your soup comes to a boil again before serving or the thickening properties will not take effect.

Read more...

Pie in a Jar

November 21, 2008

Can you freeze an entire pie? You sure can. Depending on what filling you choose. I have a detailed post planned on that topic for the future, but for now...here's a genius idea for an individual size Pie in a Jar. I found this idea on a blog today and had to share it.

I love the thought of having a bunch of these, labeled and in my freezer for a weeknight when we need a special treat. And I plan on making them in a bunch of different varities since my husband likes blueberry pie and I don't. I plan on making apple carmel pies by dicing canned apple pie filling and adding caramel ice cream topping to it before filling the crust. Yum!

The following text and photos are taken directly from the Not Martha website. Don't worry, I got her permission first!

Freezer Pie in a Jar


Try these little pies, which you construct in jars and freeze to bake later so you have individual freshly baked pies basically on demand. This is genius. Please note the importance of using jars with straight sides that don't narrow at the opening. I bought some cherry pie filling in a can because, I will not lie, I am lazy. Here are a few things I learned:

1. When putting in the bottom crust allow it to stick up over the edge to give you something to turn under and crimp later. I don't have nearly enough crust in the picture above to do the job right. My second batch, which I didn't take pictures of, had properly tucked crust and didn't leak nearly as much. When you do leave enough crust they look more like this (one from my second try): photograph by Maggi, thanks Maggi!
2. Put filling in to about 3/4ths of an inch below the top. This way you'll have enough room to put the top layer of crust on and press the edges together.
There is no really good way to get a small disk of pie dough into the jar and press it into place. I sort of made a cone to lower the dough and just smooshed everything into place, trimming a bit off where needed. Put multiple holes in top crust. If you only put one hole in the crust they might erupt like a volcano.
3. Fold over and crimp the edges as best you can.

To Bake: Bake somewhere at 375 degrees until the bottom of the crust is browning, an advantage of baking in a glass container. The top might pop off or puff up adorably. Putting a Silpat on your baking sheet keeps the little jars from sliding around when you remove them from the oven, they are otherwise frighteningly slidy and hot. Don't forget to take the lid off before you put them into the oven!


Removal from the jar is a little messy. Just go with it.
I didn't get a chance to try blueberry....yet.

Read more...

Taco Soup...Vegetarian Style

November 17, 2008

Remember this recipe for Toby's Taco Soup? It's pretty darn good, but Vegetarians don't need to miss out. Here's a version for you Herbivores too. My Sister-In-Law, Michelle, will be thrilled!


Vegetarian Taco Soup


Ingredients
1/2 c. chopped onion
2 can pinto beans (drained and rinsed)
2 cans black beans (drained and rinsed)
1 qt. tomato juice
1 pkg. taco seasoning
salt/pepper

optional additions
2 c. frozen corn
1 can diced tomatoes


Directions
- In a large pot saute onions.
- add 2 cans black and 1 can pinto beans.


- take remaining can of pinto beans and use a fork to smash the beans into a think paste. Add to pot. *


- add taco seasoning packet. Stir to coat beans.
- Dump in remaining ingredients.
- Bring to boil. Leave at hard boil for 30 minutes, uncovered.
- salt and pepper to taste.
- to serve top with shredded cheddar cheese, black olives, sour cream, green onions and taco chips.


To Freeze
- portion out individual servings by spooning soup into ziplock disposable bowls. DO NOT COVER with lids. Place on cookie sheet and flash freeze in freezer for 4 hours. Write "Taco Soup" on lids with permanent marker adding a green sticker. Cover with lids. stack in freezer.


To Reheat
From frozen: Open one edge of lid to vent. cook in microwave on high for 2 minutes. Stir. Continue cooking in two minute intervals (stirring in between) until desired temperature. Add toppings or eat plain.


*Vegetarian Tip: Ever tried to omit meat from a soup recipe and got a watery result? Adding a can of smashed beans to any soup recipe will thicken the soup base and add a meaty texture...without the meat.

Read more...

Breadsticks to die for

November 10, 2008

Remember the last post about my love affair with Puff Pastry?
Get ready to fall in love too.

Freezing Happy is not just about pulling completely meals from the freezer.
It's about having a freezer filled with a arsenal of tools to make your life easier in a variety of different ways.

So on a Monday night when you have not yet recovered from the weekend, you can make an easy and complete meal by boiling some pasta, adding your favorite jarred sauce, a green salad and whipping a few of these amazing, melt in your mouth breadsticks from the freezer to complete your meal. Or serve them as an accompaniment to a large dinner salad.

Freezy Cheese Straws


1 (9.5x9") sheet frozen puff pastry, thawed on counter for 10 minutes.
2 ounces grated *real Parmesan cheese (about 1 cup)
1/4 tsp salt
1/4 tsp. fresh ground black pepper.

- Line counter top with silpat or wax paper.
- Unwrap slightly thawed puff pastry sheet and spread open.
- Sprinkle with 1/2 grated parmesan, salt and pepper
- Cover with second layer of waxed paper and use a rolling pin to lightly press down to press cheese into dough.
- Flip the dough over, carefully remove top layer of wax paper and repeat with remaining half of ingredients.
- Replace wax paper and roll until the dough is 10.5" square.
- Remove top layer of wax paper and use a pizza cutter to slice long strips that are 3/4" wide.
- Gently twist each strip and then place it onto a silpat lined baking sheet, 1 inch apart.

To freeze: wrap baking sheet with plastic wrap and freeze for at least 2 hours and up to 24 hours. Remove from pan and place in a gallon freezer bag.

To Bake:
- Place needed amount of cheese straws onto silpat lined baking sheet.
- Bake at 425* for 8-12 minutes or until golden brown. Let cool and serve.


*Tip: How to tell it's real Parmesan.


Real Parmesan cheese will have a stamp on the rind made of many small pinholes as shown above. Fake domestic Parmesan may have a rough looking rind, but if there is no stamp...it's not going to be as good. If the real stuff is too expensive for you, go with the domestic DiGiorno brand. I guess you can try using the grodey powdery can stuff, but it's not going to compliment the buttery goodness of the puff pastry and I'll probably be a bit mad at you.
.
.

Read more...

About Puff Pastry

November 7, 2008

Let's talk about Puff Pastry.
It's one of your best friends in your quest for Freezer Domination.
Why?
Because it is incredibly versatile.


It can be sweet, savory, main dish, side dish, bread, dessert, appetizer...anything!
And it freezes like a dream.
{sigh.}
It must be love.

Get ready to see this versatile ingredient a lot here in the future.
From Beef Wellington to cherry turnovers. And bread sticks to fancy appetizers.

Read more...

On The Side: Cheesy Potatoes

November 5, 2008

I've covered a lot of Main Dish recipes so far, but the difference between going to a chain freeze-ahead place and doing it yourself is side dishes. Those chains don't provide them and let's face it, you need them to make a meal complete!

People in Utah call these "Funeral Potatoes", but you can make them for a more happy occasion. Serve these along side my Super Simple Meatloaf.


Cheesy Potatoes


1 24-ounce bag frozen shredded hash browns
1/2 cup minced onion
2 cans cream of mushroom soup
1 package cream cheese
1 1/2 cups shredded Monterey Jack cheese
1 c. shredded medium cheddar cheese
1/4 t pepper

- Soften cream cheese and cream together with soup.
- Stir in onions, cheese and pepper.
- Break apart hash browns.
- Gently stir into cheese mixture.
- Spray disposable aluminum casserole dish with cooking spray. Add potato mixture. Top with shredded cheddar.
- Cover with foil, label and freeze.

To serve: Thaw. Bake covered for 1 hour at 350°. Uncover and return to oven until cheese is melted.
.
.

Read more...

Easy Stromboli

October 27, 2008

Do you remember the villain of Disney's Pinocchio? His name is Mr. Stromboli.

He's a big 'ol scary looking Italian man who steals children.
Yikes!

But here's a Stromboli you'll love.

By definition, a Stromboli is a dish similar to a calzone found in North American pizzerias. It is thought to have been named after the 1950 film and consists of top and bottom crusts containing a mix of meats, cheese, and vegetables.

So, let's make a Stromboli that you can personalize and freeze.
On our menu tonight is...

Ham and Cheese Stromboli


1 pkg. Pepperidge Farm Puff Pastry Sheets (freezer section of grocery store)
8-10 slices deli style ham
1-2 c. shredded cheddar cheese
8 oz. sliced mushrooms
5 oz. frozen spinach thawed and squeezed
1 tsp. (or 1 clove) minced garlic
black pepper to taste


- Saute mushrooms garlic and onions in butter. Add spinach. Add pepper to taste. No salt should be needed if using ham.
- Lay out puff pastry on a silpat lined baking sheet. If not using silpat, spray sheet with cooking spray.
- Lay down 4 to 5 slices of ham down center of the pastry sheet.
- Lay veggie mixture on top of ham.
- Add shredded cheese.
- Add another layer of sliced ham.
- Join edges of pastry to form a long tube that is completely sealed.
- Sprinkle a bit of shredded cheddar on top.

Bake @ 400* for 15-20 minutes

To freeze: Wrap tightly in plastic wrap and freeze for up to 6 months. Bake from frozen @ 375* for 40-50 minutes.

I think you can see where this is going. Picky eaters? Cut your veggie filling quantities in half and only put it down one half of Stromboli.

Don't like ham? Spinach? Whatever?
Use what you want. Get creative with what you have on hand...

Try deli sliced chicken, ham and swiss for a Cordon Bleu Stromboli.
Try vegetarian Stromboli with broccoli and cheese.
Try a Italian Stromboli with mozzerella, basil and pepperoni.
The possibilities are endless.*

Depending on your choice you can serve this with soup or a green salad.


*The only caution is try not to add vegetables that contain a lot of water (like tomatoes or zucchini) if you plan on freezing this. Upon baking they will expel too much liquid.

Read more...

Shepherd's Pie

October 23, 2008

I really hate Shepherd's Pie. I always have. My mom's version combined a number of ingredients that I hate. Namely....green beans, tomato sauce, weirdly crusty mashed potatoes. But recently it was 5:30pm and I have no dinner planned yet. I assessed the cupboards and realized I could make a Shepherd's pie, my husband's favorite. Ugh. I could not find a recipe so I winged it and voila!

I feel very sheepish saying this, but it was the best Shepherd's Pie I had ever had. Quickly I jumped up and wrote down the recipe. We decided we're not too into the cheese on top, but if you wanna add it...go for it.


Emilie’s Shepherds Pie

2 lbs. lean ground beef
1 c. diced onion
2 cloves minced garlic
2 large carrots, peeled and diced to 1/4"
1 c. frozen peas
1-2 T. seasoning salt
1 (14 oz.) can tomato sauce
3-4 c. prepared mashed potatoes
2 c. shredded cheddar cheese (optional)
(I used instant potato flakes and it was great!)

-Put carrots into small bowl with 1/4 c. water and cover with plastic. Microwave on high for 6 minutes or until tender. Set aside. (you may also substitute frozen carrots, but it won't taste nearly as homemade)
-Saute onion and garlic until soft. Add beef and fry until brown. Drain. Add seasoning salt and stir to coat meat.
-Add tomato sauce, carrots and peas. Stir to combine.
-In separate bowl make 3-4 c. mashed potatoes using instant potato flakes (or leftover mashed potatoes).
-Pour into 9X13 pan and top with layer of mashed potatoes. Top with shredded cheese.
-Bake at 450* for 15-20 min or until bubbly and slightly brown on top.

To Freeze:
- Cover with Aluminum foil and freeze from up to 3 months.
- Thaw for 24 hours in fridge.
- Bake with foil on at 350* for 20 min. Remove foil and bake 10-15 more minutes or until bubbly and slightly brown on top.

Read more...

Kid Friendly Meals

October 21, 2008

I recently received this comment from a Freeze Happy reader...

I'm going to have to try (Green Eggs and Ham with Spinach Pesto), my 6 year old is really picky with veggies maybe she'll try this. Emilie could you share more kiddie recipes please? I know I could use a few more in my recipe box. Thanks! - Mandy


First off, thanks for writing. I enjoy reading comments and feedback. I just have one problem....my kids are great eaters. I don't know how it happened, but they are better eaters than I am. Once, at a dinner party I slipped my 3 year old my shrimp scampi to finish for me since I didn't care for it. Amazing, but true.

And since Freeze Happy is filled with my personal tested recipes I typically make what we eat. But I am going to read through my recipes and find some...just for you! So to Mandy and all of you parents of picky eaters...stay tuned.
.

Read more...

Freezer Vocabulary

October 18, 2008

Flash Freeze: refers to laying food in a single layer on a cookie sheet, uncovered, and keeping it in the freezer for 4 hours or until each individual piece is frozen and can be handled. Flash freezing is always followed by storing the items in a fully wrapped container or a fully sealed ziplock to prevent freezer burn.

Silpat: a Silpat Mat is a silicone mat made to fit perfectly into a standard size cookie sheet. It is completely nonstick and allows flash frozen food to be removed easily from pans without tearing. They are expensive, but I highly recommend owning two. They last forever, can be washed and will make you feel like Martha Stewart. Priceless.

Ziplock: Refers to any plastic freezer bag with a locking top. Many are made specifically for use in freezing foods. I always use single size or gallon size.

Wax Paper: is found next to the aluminum foil in your local grocery store and can be used in place of a silpat if needed, although it is not quite as effective. Wax paper should never be put into the oven or used for cooking. Wax paper is not the same as parchment paper.

Read more...

Fun with Pesto

To round off the pesto excitement I give you a freakin' cool thing to make with pesto.

And you're gunna love it because it's super fun
AND
Gets your kids to eat hidden veggies.
Spinach no less.


First...Read this book.


Then...make this dish.


Yep. Serve you kids up a helping of Green Eggs and Ham.

Add 1 Tbsp. of Spinach Pesto* to 2-3 eggs prior to scrambling.
Top with finely shredded parmesan.
Serve with pan fried slices of ham.


*Spinach Pesto:
1 1/2 cups packed fresh spinach greens, washed and dried
1/4 cup fresh basil leaves
4 cloves roasted garlic, chopped
1/4 cup grated Parmesan, optional
1 cup extra-virgin olive oil
Salt

Read more...

15 Uses for Pesto

October 16, 2008

So, you've got your pesto made and all frozen. Now, what do you do with it? Here are 15 ways to make that Pesto sing. And stay tuned for one more fun and fabulous Pesto idea later this week. You'll LOVE it!


1. For pasta, toss a few tablespoons of pesto with hot pasta and a bit of the cooking water until well coated. Also try adding roasted asparagus and cooked chicken to the dish for a heartier meal.

2. Upbeat Soup. Stir a teaspoon of pesto into a bowl of piping hot soup just before serving as a colorful and tasty garnish.

3. Refresh Fish. Allow a bit of pesto to melt over the top of broiled fish or steamed veggies.

4. To make a terrific appetizer, lightly toast slices of French bread. Toss some diced tomatoes and artichoke hearts into your pesto, spread on a thin layer of pesto and pass under a broiler until it is hot and bubbly.


5. Mix some into mayo for an awesome sandwich spread. Great for waking up a turkey sandwich or adding another dimension to an Italian cold cut sandwich.

6. Top it off. You might also spread a layer of pesto over your pork chops or steaks just before you finish broiling them.
7. Better Bread. Or make your favorite bread recipe. Roll it out like pizza dough, spread on pesto and roll it up as if you were making cinnamon rolls. Bake as usual.

8. Or create a fancy-shmancy pizza by replacing the regular tomato sauce with pesto.


9. Add vinegar, olive oil and pepper, and you'll have a wonderful vinaigrette dressing for your salads.

10. Marinade. Rub beneath skin of a whole chicken or chicken breast and bake as usual.

11. Add it to your eggs before cooking your next omelet.

12. Mix a little in with your chicken salad.

13. Healthy Alternative. Brush it on roasted or boiled corn on the cob in lieu of butter.


14. Better Burgers. Mix with ground beef (or ground turkey) and make hamburgers on the grill. Outstanding!

15. Pesto Potato Salad. Boil red potatoes. Mix potato slices and chopped sauteed onion. Add 2 or 3 chopped tomatoes, red onions, then mix olive oil, some vinegar, salt, pepper and pesto to form a nice dressing and pour over potato salad. Should marinate for an hour or so.


Read more...

How Long is Too Long?

October 13, 2008

I got a great question from Tricia in Delaware about freezing meals.

How long a dish be frozen for and still be edible? I've only taken one or two stabs at trying to freeze something and, to be honest, it was so long between putting the dish in my freezer and pulling it out again to cook that I wasn't sure it was still good and (gasp!) I ended up just tossing it. Is there a general rule I should follow as I freeze?

Want to know something interesting? The USDA says that freezing keeps food safe almost indefinitely, so recommended storage times are for quality only.
I have absolutely kept item in my freezer for a full year. One day a year I make homemade turkey meatballs and my Ukrainian Grandmother's pierogies in a 14 dozen amount. Yep...14 dozen. And it lasts us an entire year and they are great until the end.

What I generally do is when I am making a dinner I make enough for 3 meals and freeze two of them. Then each Monday is Make-Ahead-Monday. On Sunday I pull one out of the freezer to thaw it in the refrigerator. Then we have it for dinner on Monday and that makes clean-up easy and fast since my house is always a wreck after the weekend.

This keeps your frozen meals in constant rotation and insures the quality of the food remains in tact.

Read more...

Pesto Perfection

October 11, 2008

Did you know that pesto freezes perfectly?
Well it does. And it's super easy to make!
It's a great sauce that has so many uses.
Check back this week for a follow-up post featuring 15 things to do with Pesto.

So here's your basic recipe.

CLASSIC PESTO


1/4 c. pine nuts
1 garlic clove
2 c. packed fresh basil leaves (or fresh spinach leaves if your family doesn't like basil)
6 Tbsp. extra virgin olive oil
2 Tbsp. fresh parsley
1/4 c. fresh grated parmesan cheese*
salt & pepper to taste

*(must use high quality parm. Make sure it has stamped pin dots in the rind...that how you can tell it's real)

- Toast nuts in a dry frying pan on med heat for 7-8 minutes. stirring frequently. Let cool.
- Throw all ingredients into a blender and mix until smooth.

To freeze:
Var 1. Put into air tight container. Top with 1 Tbsp. olive oil and freeze.
Var 2. Pour into ice cube tray. top with plastic wrap and freeze completely. Remove cubes from tray and store in ziplock baggie. This is a great way to throw a cube or two into soups.

To thaw:
In fridge: Thaw in fridge for 24 hours.
Microwave: cook at 50% power for 5-10 minutes, stirring every 2 minutes.

Read more...

Calling all Mommies!

October 9, 2008


Yes, Freezer Friends....I am currently working on a bunch of new recipes to post here in the near future, but for right now I have a secret to share with you!

Neither of my girls would ever touch a teething ring. I'm not sure why, but they seemed to avoid those things like the plague. I watched them chew and gnaw on every other toy in sight, but the minute I handed them a teether they refused to put it in their mouth.

Remember our Freeze Happy mini pancakes? They are delightful to eat, but they are also a perfect baby teether. These mini pancakes taken straight from the freezer are great. My youngest has chewed them while teething when nothing else worked!


So Mommies with teething babies...give this a try!
.

Read more...

Oh, so you want Beef Pot Pie eh?

October 1, 2008

You carnivores! Always wanting red meat.
Okay okay.
The Chicken Pot Pie recipe can easily be adapted for a beef pot pie.

Beef Pot Pie


2 pkg Tyson Beef Roast in Gravy (yes...it's expensive, but you get a truly homemade taste.)
2 c. diced cooked potatoes
1 c. diced onion
10 oz. chopped fresh mushroom (or 1 can mushrooms)
1 jar (12 oz) brown gravy
1/4 tsp. dried thyme leaves
2 tsp. dried parsley
1&1/2 tsp. salt
1 tsp. pepper
1 Tbsp. cornstarch

2 refrigerated pie crusts for tops only or 4 crusts if you want a bottom crust as well.
2 disposable aluminum pie plates

Directions
1. Unroll pie crust on work surface. Fit bottom into pie plate if making a two crust pie. For a top crust only pie spray bottom of pie plate with cooking spray before filling.
2. Mix all ingredients in a large mixing bowl.
3. Fill with filling and cover with top crust. Cut 4 slit into top of crust.

To Freeze
Cover twice tightly with plastic wrap, label and store in freezer.

To Bake
- Remove plastic. Place pie onto foil lined baking sheet.
- Bake at 375* on very bottom rack if making a two crust pie.
Thawed: 40-50 min.
Frozen: 1 hr 15 min-1 hr 45 min.

Read more...

Pie Crust : Part 2

September 27, 2008

Since I blogged about pie crusts it got me to thinking. How about sharing other great freezer recipes using pie crusts? Oh yeah.

Wanna know a great one? Chicken Pot Pies.

You can make these and throw them in the freezer. Pot Pie is a recipe I usually "wing" so I am including a recipe that is not of my own making. This recipe is taken from the Pillsbury Website. I am going to try it this week. Feel free to leave comments if you give it a try.

Chicken Pot Pie
makes 2, 9" pies


2 c. diced cooked chicken (I use a cooked rotisserie chicken. Easy and it's cheap!)
2 c. diced potatoes
1 c. diced onion
2 c. frozen pea and carrot medley
2 small celery ribs sliced 1/4" thick
1/2 c. sour cream
1 jar (12 oz) turkey gravy
1/4 tsp. dried sage leaves
2 tsp. dried parsley
2 refrigerated pie crusts for tops only or 4 crusts if you want a bottom crust as well.

2 disposable aluminum pie plates


Directions
1. Heat oven to 375°F. Spray 3-quart casserole with cooking spray. In large bowl, mix all ingredients; spoon mixture into casserole.

2. Unroll pie crust on work surface. Fit bottom into pie plate if making a two crust pie. For a top crust only pie spray bottom of pie plate with cooking spray before filling. Fill with filling and cover with top crust. Cut 4 slit into top of crust.

3. Cover twice tightly with plastic wrap, label and store in freezer.


To Bake
Unwrap plastic. Place pie onto foil lined baking sheet. Bake at 375* on very bottom rack of oven.
Thawed: 40-50 min.
Frozen: 1 hr 15 min-1 hr 45 min.

Read more...

Quiche Your Way

September 25, 2008

Did you know you can freeze pie crust? It's true and it's a very helpful time saver. You can make your own recipe for pie crust and simply wrap it tightly in plastic wrap and seal into a ziplock bag. Defrost for 24 hours before using.

If you're not a pastry master, you can buy refrigerated pie crust and throw it straight into the freezer. When you're ready to use one thaw in refrigerator for 24 hours or simply take out of freezer and leave on counter top at room temperature until thawed. 1-2 hours.

So what can you make with a simple pie crust?
Lots of things.
But my favorite is quiche.

Emilie's Quiche


1 unbaked pie crust

wet ingredients
5 eggs
2 c. whole milk
1 T flour
½ tsp. salt
½ tsp. pepper
¼ tsp. dry mustard
1 tsp. Worcester sauce (omit for vegetarian version)
1 clove minced garlic
1 T dried parsley flakes

other ingredients
(this is the part where you can really add anything you want. cooked broccoli, cooked bacon, any kind of cheese, green peppers, diced tomatoes...anything!)

½ c. chopped green onion
½ c. mushrooms
1 c. frozen spinach
3 c. shredded sharp cheddar cheese
1 c. ham (or omit for a vegetarian quiche)

directions
-Roll out pie crust into pie plate (if you have a quiche pan...even better).
-Prick shell with fork and bake @ 400 for 15 minutes.
-Put ½ cheese in bottom of crust.
-Add remaining ingredients in layers in the bottom of the crust.
-Combine wet ingredients and pour gently into crust.
-Top with remaining cheese.

-Bake @ 350* for 50 min. Allow to cool for around 15-20 minutes so it sets up.

Read more...

Factoid: Butter vs. Shortening

September 22, 2008


The most frequently asked question on this blog is why I use a mixture of half shortening (butter flavored shortening to be exact) and half butter in my cookies. And can people choose which one they want to use and exclude the other. You butter lovers, you!

Here's the answer:

Butter and Shortening both add different chemical properties to baked goods. This mostly has to do with their evaporation level and how they react to heat. Butter increases browning and adds a crisps texture to baked goods. It also evaporates more quickly, but then lends less stability to the finished product. Butter also has the best flavor. Shortening does not brown food nearly as much. It takes longer to evaporate and adds a more elastic texture to baked goods.

So when I bake cookies I use a mixture of half butter and half shortening. Why? Because I get the best of both worlds. The butter helps to crisp the outside and the shortening helps your cookie retain moisture.

So if you choose to use all butter, your cookie will turn out a bit more browned and more crisp, but may also stale or dry out more quickly. If you use only shortening you will get a softer cookie with less texture and less flavor.

I hope that helps.

Read more...

Finger Lickin' Sticky Chicken

August 20, 2008

Juicy and flavorful, with a deep-brown chewy glaze, Sticky Chicken is a favorite recipe of many families. Perfect for once-a-month cooking! Okay, so I actually haven't tried this yet, but my girlfriend swears it's amazing. So I can't wait to give it a go and see what you think as well.

STICKY CHICKEN
source: organizedhome.com
Serves: 4

Ingredients
4 t salt
2 t paprika
1 t cayenne pepper
1 t onion powder
1 t thyme
1 t white pepper
1⁄2 t garlic powder
1 t black pepper
1 roasting chicken (about 3 lbs.)
1 c onion, chopped

To Prep:
In a small bowl, thoroughly combine all the spices. Remove giblets from chicken, clean the cavity well and pat dry with paper towels.

Rub the spice mixture into the chicken, both inside and out, making sure it is evenly distributed and down deep into the skin.

To Freeze: Place in zipper food storage bag, seal and freeze.

To Cook:
Thaw in refrigerator for 1-2 days, until fully thawed.

Stuff cavity with onions, and place in a shallow baking pan. Roast uncovered at 250 degrees for 5 hours.

After the first hour, baste chicken every 30 minutes with pan juices. The pan juices will start to caramelize on the bottom of the pan and the chicken will turn golden brown.

Let chicken rest 10 minutes before carving.


A note about Sticky Chicken and food safety:
This revered Internet recipe has appeared online since 1991, and has been enjoyed at home by thousands of families. However, modern food safety guidelines do not recommend cooking poultry at the low temperature given in this recipe. The US Department of Agriculture recommends cooking poultry at oven temperatures of 325 degrees or higher.

Read more...

Chicken Cordon Bleu

August 16, 2008

I have always loved Chicken Cordon Bleu. What's not to like? Chicken, ham cheese topped with a creamy cheese sauce? Delicious. Now you can feel like a Parisian any day of the week. Voila! Who says you can't be fancy-shmancy when you Freeze Happy!?


Chicken Cordon Bleu

4 boneless, skinless chicken breasts
4 slices of ham, thinly sliced
4 slices Swiss cheese
2 c. seasoned bread crumbs
1/4 c. grated parmesan
2 T. butter

Sauce
1/2 c canned cream of chicken soup
1/4 c sour cream

1/4 c. milk
1 T dijon mustard
1 c mushrooms, sliced
1 t minced garlic
1 t salt
½ t black pepper
2 T. fresh chopped flat leaf parsley (or 2 tsp. dried)

The Prep:
- Combine bread crumbs with grated parmesan. Mix to combine.
- Place each chicken breast on a cutting board between pieces of wax paper. Use a skillet to pound the chicken breast until it is 1/2-1/4" think.
- Arrange a slice of ham and Swiss cheese on top of each one. Roll each chicken breast tightly and secure with a toothpick.
- Coat with melted butter and roll in bread crumbs.
- Place in baking dish.

- In a bowl combine sauce ingredients. Mix thoroughly. Heat in sauce pan and pour over chicken just before serving (or serve in a gravy boat on the side).

To Bake:
- Bake uncovered for 45 minutes at 375.

To Freeze: Cover UNCOOKED meal with plastic wrap and foil. Freeze for up to three months. Thaw in refrigerator before cooking as directed above. Combine sauce ingredients and freeze in small container. Heat sauce in microwave or on stove top and pour over chicken just before serving.

Read more...

BBQ Basics

August 10, 2008

It's official. Being Freeze Happy doesn't have to be complicated. And here's a recipe you'll love. Don't waste time and effort making a complicated bar-b-que sauce (unless you want to...but do you really want to?) . Just grab a bottle or two of your favorite store bought sauce and make it your own by adding a few chopped veggies and garlic.


Crock Pot Barbecue

2 lbs beef chuck roast (or pork roast or turkey breast...yep, your choice)
1 c yellow onions, diced
1 green pepper, chopped (optional)
1 t minced garlic
1 c. water
1 bottle store bought bar-b-q sauce

To Freeze
- Place all ingredients into a gallon sized freezer bag.
- Label bag and freeze.

To Cook
- Thaw in refrigerator.
- Dump contents into a slow cooker. I love lining the cooker with these liners first. They really work.
- Cook on low setting for 6-8 hours, until the meat falls apart easily. Shred the meat with a fork.

To Serve
- Serve on hamburger buns. Add store bough cole slaw and dill pickles for an authentic twist.

Read more...

Peanut Butter & Jelly Cookies

August 5, 2008

Remember how much you loved peanut butter and jelly sandwiches when you were little and remember how often you ate them? Why do we stop eating them once we pass a certain age? Well, that's about to change because I am sharing a classic cookie with you that even the most adulty adult will love!

Peanut Butter & Jelly Cookies
4-5 doz.

Cream Together:
1/2 c. butter
1/2 c. butter flavored crisco
1&1/2 c. crunchy peanut butter
1 c. white sugar
1 c. lt. brown sugar

Add:
2 eggs
1 tsp. vanilla

Sift Together and Add:
3 c. all purpose flour
1 tsp. bkg powder
1/2 tsp. salt
1&1/2 tsp. baking soda

- Combine all ingredients to form a stiff dough.
- Scoop out onto cookie sheet.
- Dip a fork into white sugar and use it to press down on the cookie. First one direction and then in the opposite direction.

To Freeze: At this point you can flash freeze cookies on sheet pan for 2-3 hours and transfer to gallon size ziplock until ready to bake.

To Bake:
- Bake @ 350* for 8-10 min. Remove from oven and drop pan (as shown in Chocolate Chip Cookie recipe). Fig. 1
- While still on pan and warm, use thumb to press indent in the top of cookie. Fig. 2 & 3
- Transfer to cooling rack.
- Fill sandwich size ziplock baggie with 2-3 T. raspberry preserves. Cut corner off ziplock to create a piping bag. Fig. 4
- Pipe raspberry preserves into indentation on cookie. Fig. 5
- Cool and eat. Fig. 6

Not diggin' the jelly action. Leave it out and just make these amazing Peanut Butter Cookies for the entire family.

Read more...

Em's Chocolate Chip Cookies

July 30, 2008

Here it is.
The moment you've all been waiting for.
The moment you'll thank me for.
The greatest freeze ahead tip evah!
Chocolate Chip Cookie Dough.

It's true. Mommies of the world rejoice! You have the capability to freeze huge amounts of balls of frozen cookie dough and cook them up whenever you want, straight from freezer to oven, in less than 10 minutes. Do you see the genius here? Mom I need 4 dozen cookies for Boy Scouts? No problem. Mom, Janie is coming over after school and we just want a little snack. Sure thing. I've had a crappy day. All I want are 3 fresh baked cookies. They're yours.

Let's get started. Here's my recipe for freezer chocolate chip cookies.


Chocolate Chip Cookies
(makes 6-7 dozen)

Beat together:
1 c. butter
1 c. butter flavored shortening
1 c. white sugar
1&1/2 c. lt. brown sugar

Add:
3 eggs
1 T. vanilla

Sift into a large bowl:
4 c. flour
2 tsp. baking soda
1&1/2 tsp. salt

- Add wet ingredients to flour mixture and combine with wooden spoon. Add 2 bags chocolate chips. Mix.

To freeze:
- Use a cookie scoop to scoop out evenly sized balls of dough. Place them about 1/2" apart on a silpat lined baking sheet.


- Use your fingers to slightly flatten balls of dough.


- Place filled cookie sheet, uncovered, in freezer for 2-3 hours or until balls are frozen. Do not leave in for more than 3 hours.


- Remove from cookie sheet and place in a gallon size Ziplock bag. Label and store in freezer.


To cook from frozen:
- remove as many dough balls as you want to bake and place 12 on a cookie sheet.
- Bake at 350* for 8-10 minutes.
- As soon as you remove them from the oven, hold the cookie sheet 4 inches above the floor (or counter if you have heat safe countertops) and drop the sheet. This releases excess air in the cookies and makes them more moist and chewy. (that's a baker's trick I learned when working in a professional bakery when I was 19 years old)
- Let cool on rack and devour like a crazy person. Yum!


Note: Don't want to use my recipe? Have your own family favorite that everyone loves? Don't worry...I won't be offended. You can freeze your own recipe with minimal changes. The only thing you may want to amend is increasing the flour slightly. Try freezing one dozen as a test first and see if they remain as firm as you like them even after baking. If not, add 1/4 c. of flour next time and see if that does the trick.

You'll soon be the most popular Mom in the PTA. Guarantee it.
Now, this is a recipe that can make you Freeze Happy!

Read more...

Chicken Potato Casserole

July 26, 2008

Why is it that chicken and potatoes makes me think of good 'ol home cookin'? Well it does and this recipe is warm, comforting and , best of all, a breeze to make and freeze.

*Now, here's my disclaimer. This recipes is pretty simple and is great for a meal to take to a Mommy with small kids, but is not nearly jazzy enough for serious "foodies". So in other words, my kids loved it and my husband and I thought it was just a bit boring, but good for a comfort food kind of day.


Chicken Potato Casserole

Ingredients:
10 oz. can condensed cream of chicken soup
1 cup sour cream
1/4 cup milk
1 tsp. minced garlic
2 cups cubed cooked chicken
1-1/4 cups shredded cheddar cheese
3-1/2 cups frozen hash brown potatoes
1 c. fresh or frozen chooped brocolli
3/4 c. diced onions
1 cup shredded cheddar cheese (to top casserole)
1/2 c. bread crumbs (optional)


Preparation:

In a medium bowl, combine soup, sour cream, milk, chicken, garlic and 1-1/4 cups cheese. Spread three-quarters of this mixture in a greased 2-quart baking dish.

Sprinkle hash browns over casserole. Add brocolli and onions over the top of the casserole and press down lightly, then top vegetables with remaining soup mixture. Sprinkle with remaining cheese and bread crumbs.


To freeze: Wrap casserole in heavy duty foil and freeze.

To bake: Uncover and bake at 350 * for 60-70 minutes until bubbly.

Read more...

Best Meatloaf!

July 22, 2008

My husband and I have good friends named Matt and Jenny. One night we joined them for dinner and I had the best meatloaf of my life. I have had a pretty sad meatloaf experiences (like most of you out there) where the meatloaf was like a solid block of greasy meat. Yuck. But Jenny's meatloaf was perfection. Not too bland, perfect amount of binder, perfect seasoning. I had to get the recipe. Imagine my surprise when she said You won't need a pen and paper, I can just tell you and you'll remember.

I made it for my sister (who had 3 kids at the time) and she loved it and promptly made and froze 5 more for an upcoming surgery she was having. I also recently made this for a dinner party with family and friends and it got rave reviews by all. Yes, this one's a keeper! Trust me.

*On the day I took these photos I made three meatloaves so amounts shown in pictures are tripled.


Super Simple Meatloaf
Recipe from Jenny Meese
(recipe makes 1 loaf and can be multiplied.)

1-1&1/2 lb. ground beef
1 egg
1 tsp. minced garlic
1/2 c. chopped onion
1 can manwich
1 box stove top chicken stuffing


Directions
- Place stove top stuffing in gallon sized ziplock bag. Seal bag and use a rolling pin to crush. (this is optional, but my sister and I both felt the bread crumbs were too large in the finished meatloaf when added straight from the box)


- Combine all ingredients (including seasoning packet from stuffing) in a large bowl.


- Mix with hands. Feels kind of creepy, but in a fun, childhood way.


- Place in loaf pan and top with ketchup (if that's how you like your meatloaf)


- Bake at 350* for 40-55 minutes or until internal temperature is 155*

Freezing Instructions
-Place raw meatloaf mixture in disposable aluminum loaf pan.
-Cover with foil and freeze.
-Thaw in refrigerator for 24 hours before baking.
- Bake as directed.


Healthier Options
- Replace half pound of raw hamburger meat with lean ground turkey.

Don't Try
- Manwich "bold". We like spicy food, but it turned out nasty.
-Other flavors of stuffing besides chicken. We have tried both pork and beef and both produced a weird taste.

Serve With
- Stuffed Baked Potatoes (recipe to follow this month)
- steamed veggies.

Read more...

Vegetarian Jambalaya

July 19, 2008

True jambalaya uses sausages, shrimp and chicken. This rich vegetarian recipe version uses beans to provide meaty texture and flavor - with no meat. My kids gobbled this up and so did my husband (the manly meat-eater) and I. This tastes so much like there is meat present that it's a bit spooky.

.
Veggie Jambalaya


Ingredients:
1 Tbsp. oil
1/2 c. onion, chopped
1 green bell pepper, chopped
1/2 cup chopped celery
3 garlic cloves, minced
2 cups water
14 oz. can diced tomatoes, undrained
8 oz. can tomato sauce
1/2 tsp. dried Italian seasoning
1/4 tsp. crushed red pepper flakes (reduce or omit based on spice preference)
1/8 tsp. fennel seeds, crushed (not usually in my cupboard, but totally worth buying for this recipe)
1 cup uncooked long grain rice
15 oz. can butter beans, rinsed and drained
15 oz. can red beans, rinsed and drained


Preparation:

In a large skillet, heat oil over medium heat. Cook onion, green bell pepper, celery, and garlic in hot oil until tender, about 5-10 minutes, stirring frequently. Add water, tomatoes, tomato sauce, Italian seasoning, cayenne and fennel seed.

Bring to a boil and add rice. Reduce heat to low, cover and simmer for 20-25 minutes until rice is tender, stirring frequently.

Add beans and cover. Simmer 5-10 minutes longer or until well heated, stirring frequently.

To freeze: cool casserole in refrigerator and ladle into plastic freezer containers. Seal and freeze.

To reheat: Place frozen jambalaya in saucepan and heat over very low heat, breaking up and stirring frequently, until hot. Serves 6-8

Read more...

Freezing Cooked Rice

July 17, 2008

Rice can take quite a significant amount of time to cook, especially the brown rice that we like. And I hate the taste of quick rice. So you will be happy to know that you can freeze rice for later!
You just need to follow a few important steps before freezing to ensure the quality is still good when you go to thaw and re-use it in a later dish.


Instructions:
- Cook your rice as usual.

- Allow to cool at room temperature, then place in refrigerator. Allowing the rice to chill will avoid the problem of mushy rice when you thaw it.

- After the rice is chilled in the fridge, transfer rice to freezer bags by one or two cup incriments. Label and freeze.


To Reheat: simply thaw in refridgerator and reheat in microwave!

Read more...

Manicotti

July 14, 2008

You asked for it and here it is.
The very first vegetarian recipe.


MANICOTTI
makes 4 meals for a small family, 2 for a large family or potluck

Ingredients:
2 pkgs. manicotti noodles
1 (32 oz.) container of cottage cheese*
1 (32 oz.) container of ricotta cheese*
32 oz. part skim mozzarella cheese, shredded
2 eggs
2 tsp minced garlic (or 2 minced cloves)
large handful chopped fresh parsley
1/4 c. chopped fresh basil leaves or 2 T. dried
8 oz frozen spinach, thawed and drained (optional)
2 tsp. salt
2 jars canned pasta sauce

Tools:
large pot
4, 8x8" square aluminum disposable pans or 2 9x13" disposable pans
gallon size ziplock bag
scissors
aluminum foil
sharpie permanent marker

Assembly Instructions:
- Boil manicotti noodles in large pot of boiling, salted water for 5 minutes.
- Remove from pot and place on silpat lined (or oiled) baking sheet to cool.


- Combine cottage cheese and ricotta cheese*.
- add herbs, salt, garlic, eggs and frozen spinach (if desired). Stir thoroughly to combine.


- Add 2 cups grated mozzarella cheese. Stir to combine.


- Next you'll need a large ziplock bag and a pair of kitchen shears or clean scissors. Fill freezer bag with filling mixture. Seal top and cut small edge from bottom corner. This has now become like a large piping bag.

- Spread 1/4 c sauce in bottom of pan (so noddles don't stick while baking).


- Take manicotti tubes one at a time, hold noodle in one hand, place clipped edge of ziplock into the top of the noodle. Apply slight pressure to the ziplock to fill noodle with filling mixture.

- Lay in close together, but not crowded, in a row in baking sheet. Repeat until pan is filled with one layer of filled manicotti.


- Spread a layer of jarred sauce on noodles.


- Top with 2 cups grated mozzarella.


- Take piece of foil large enough to cover pan. Write Manicotti and the baking instructions. Label with a red sticker to indicate that this item should be thawed before baking for best results. Repeat until all other pans are completed.


Baking Instructions:
- Bake at 350 degrees for 30-40 minutes or until cheese is browned and sauce is bubbling. Sprinkle top with fresh cut parsley is desired.

Serving Suggestions:
- Serve with rustic bread and a side salad.


*Alright...let's talk soft cheese for a minute. I have always disliked the texture of straight ricotta cheese. I find it kind of pastey. Also, it's kind of pricey. Some people I know (including my mom) substitute with cottage cheese, but we all know that leaves your filling with no flavor or cheesy goodness. My solution is to mix the two 50/50. This is not only more affordable, but it makes a creamier filling.

Read more...
Related Posts with Thumbnails

About This Blog

A new recipe will be posted each Monday and, of course, you can always search the archives by category.

The Goal of this blog is not just to give you my recipes, but to teach you which ingredients freeze well, which don't, methods and tips to help you freeze your own recipes...because who knows better what your family likes than you?

Do you only cook organic? Great! Are you a vegetarian? No problem! Make what works for you and save time, money and (let's be honest...stress) while doing it.

The Freeze Happy philosophy has made my life better and I'm pretty sure it can improve yours too.

Legal Stuff

Copyright © 2008-2010 Emilie Ahern. The content on these pages, including text and images are the sole property of the author unless otherwise noted and may not be used or reproduced in any manner without consent. All Rights Reserved.

  © Blogger template On The Road by Ourblogtemplates.com 2009

Back to TOP