Showing posts with label Desserts. Show all posts

Chocolate Surprise Cake

February 22, 2010

Well, it doesn't get much easier than this.
And it's a fabulous cake to have in your freezer for unexpected company or to lessen stress over the holidays or around birthdays! The surprise is the whipped cream center....shhhh!


Chocolate Surprise Cake

1 pkg boxed chocolate cake mix
1 pint heavy whipping cream
3 Tbsp. white sugar
1/4 cup powdered sugar or 1 tub chocolate frosting

To Prepare
- Bake cake per box directions. You can make it a 9x13" or use cake pans to make two small round cakes.
- Place on a wire rack and cool completely.
- Beat heavy whipping cream with sugar until stiff peaks form.
- Split cake into two layers using serrated knife or cake splitter.
- Fill center of cake with *whipped cream and replace top layer.

To Freeze
- Wrap entire cake in plastic wrap and store in freezer for up to 6 months.

To Serve
- Remove from freezer and let thaw on counter for 30-60 minutes or thaw in fridge overnight.
- Top with a light dusting of powdered sugar or frost with chocolate frosting and top with chocolate curls.

* If you can't eat dairy you can replace the whipped cream with Cool Whip.

Read more...

Fruit Crisp Topping

February 15, 2010

Hmmmm....it's been a while since I shared something sweet, and since Valentine's Day was yesterday I thought it was appropriate.

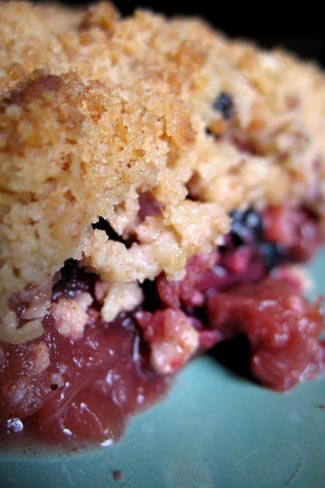
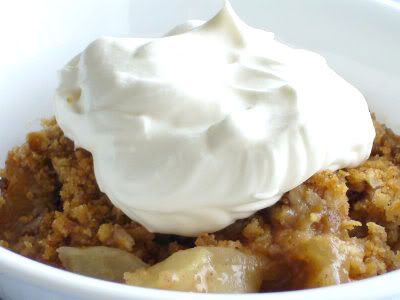
This is a great little trick for whipping up delicious fruit filled desserts in a snap. You can top entire pies with this, fruit crumbles or homemade muffins as well.


FRUIT CRISP TOPPING
Makes 8 cups (enough for 4 - 9 inch pies/crumbles)

1/4 c. + 2 Tbsp. all purpose flour
1/2 c. packed lt. brown sugar
1/2 c. sugar
1 tsp. cinnamon
1/2 tsp. salt
1&1/2 sticks unsalted butter, chilled

Optional
1/2 c. finely chopped nuts (almonds, pecans, walnuts, etc)
1 c. quick oats

To Prepare
- Mix dry ingredients. You can sift together or stir vigorously with a whisk.
- Cut butter into small 1/2" cubes. Use a pastry cutter or knife to break up butter into pea sized (or slightly smaller) balls.
- Flash freeze on a cookie sheet for 1 hour.
- Break up any large clumps with fork or hands.
- Store in small zip lock freezer bags by 2 cup increments (4 bags total). Label with marker.

To Serve (on pies/crisps)
- Sprinkle contents of one bag (or 2 cups) over a 8x8" pan of sweetened fresh or frozen fruit or on top of a crustless 9 inch pie.
- Bake at 375* for 40 minutes

To Serve (as muffin topper)
- Prepare any muffin recipe.
- Sprinkle 2 Tbsp. of crumble on top
- Bake per your recipe instructions.

Read more...

Happy Birthday to ME! Cake Freezing.

September 21, 2009

Today is my 32nd birthday.
{pause for applause}

And in honor of that I am going to share a fabulous tip for freezing baked cakes.
Yes, a lot of the bakeries do it and here's how to make it successful.


To Freeze
- Bake a cake as you normally would and cool completely (I always use cakemix, but you can bake from scratch if you prefer).
- Cut into layers if desired.
- Wrap each layer tightly in plastic wrap.
- Then stack layers together and wrap tightly into one cake with plastic wrap.
- Label and freeze for up to 4 months.

To Serve
When you're ready to serve simply remove cakes and allow to thaw slightly on kitchen counter. You have no idea how much easier it is to frost a slightly frozen cake! Add filling and frost and then store in refrigerator or on counter until ready to serve.

Another Tip
For an even easier and tasty alternative, before freezing fill layers with real whipping cream, put cake into layers, wrap and freeze. This is like a huge Whoopie Pie and can be eaten still slightly frozen, cool or completely thawed. You can eat it plain, frost it with regular frosting or you can also top with fresh berries or canned fruit pie filling.

This is such a useful trick for church potlucks, unexpected classroom parties and last minute visitors. So bake up a few cakes today and freeze them for later...you'll be glad that you did!

Read more...

REAL Whipped Cream On The Go!

March 9, 2009

This tip is dedicated to my Mother, the whipped cream champion of the world. I don't think Cool Whip passed my lips until I was in my 20's.

FREEZING REAL WHIPPING CREAM
You can freeze real whipping cream and use it to top deserts and hot cocoa and anything else you can think of, without having to whip an entire container of whipping cream every time!

1 cup heavy cream/whipping cream (the WalMart house brand is wonderful)
1 tsp granulated sugar

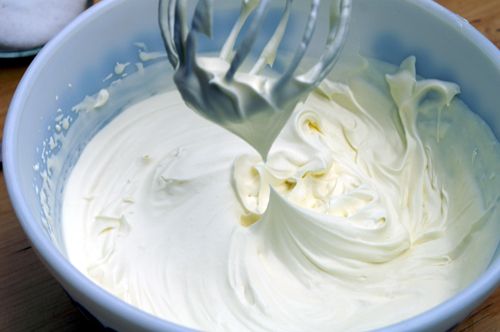
- In a large bowl combine ingredients and beat with hand mixer until it begins to form peaks. (That means when you stop the beaters and lift them straight out of the cream, a peak forms and folds over slightly...as shown below.)


- Line a cookie sheet with wax paper. Dollop whipped cream onto the cookie sheet in single-serving sizes of your preference. If you want to get really fancy and impress your Mother-In-Law, pipe whipped cream out using a pastry bag fitted with a large star tip*.

- Flash freeze on cookie sheet. Then transfer to a ziploc freezer bag or freezer container.

To Serve: You only need a few minutes to allow it to thaw, which you can usually do right on the dessert.


*Please Note: Now, I'm going to tell you this because I love you and we've reached a certain level of trust in our relationship. Please, if you must pipe, don't make the common mistake (spurred on by legions of Semi-Homemade With Sandra Lee fans) of just snipping the edge off of a plastic bag. This results in a very unattractive snake-like appearance which, when piled into a deviled egg or topped on your delightful dessert, looks remarkably like kitty poo. I'm sorry, I just had to say it.


(Don't do this)

Read more...

Pie in a Jar

November 21, 2008

Can you freeze an entire pie? You sure can. Depending on what filling you choose. I have a detailed post planned on that topic for the future, but for now...here's a genius idea for an individual size Pie in a Jar. I found this idea on a blog today and had to share it.

I love the thought of having a bunch of these, labeled and in my freezer for a weeknight when we need a special treat. And I plan on making them in a bunch of different varities since my husband likes blueberry pie and I don't. I plan on making apple carmel pies by dicing canned apple pie filling and adding caramel ice cream topping to it before filling the crust. Yum!

The following text and photos are taken directly from the Not Martha website. Don't worry, I got her permission first!

Freezer Pie in a Jar


Try these little pies, which you construct in jars and freeze to bake later so you have individual freshly baked pies basically on demand. This is genius. Please note the importance of using jars with straight sides that don't narrow at the opening. I bought some cherry pie filling in a can because, I will not lie, I am lazy. Here are a few things I learned:

1. When putting in the bottom crust allow it to stick up over the edge to give you something to turn under and crimp later. I don't have nearly enough crust in the picture above to do the job right. My second batch, which I didn't take pictures of, had properly tucked crust and didn't leak nearly as much. When you do leave enough crust they look more like this (one from my second try): photograph by Maggi, thanks Maggi!
2. Put filling in to about 3/4ths of an inch below the top. This way you'll have enough room to put the top layer of crust on and press the edges together.
There is no really good way to get a small disk of pie dough into the jar and press it into place. I sort of made a cone to lower the dough and just smooshed everything into place, trimming a bit off where needed. Put multiple holes in top crust. If you only put one hole in the crust they might erupt like a volcano.
3. Fold over and crimp the edges as best you can.

To Bake: Bake somewhere at 375 degrees until the bottom of the crust is browning, an advantage of baking in a glass container. The top might pop off or puff up adorably. Putting a Silpat on your baking sheet keeps the little jars from sliding around when you remove them from the oven, they are otherwise frighteningly slidy and hot. Don't forget to take the lid off before you put them into the oven!


Removal from the jar is a little messy. Just go with it.
I didn't get a chance to try blueberry....yet.

Read more...

Peanut Butter & Jelly Cookies

August 5, 2008

Remember how much you loved peanut butter and jelly sandwiches when you were little and remember how often you ate them? Why do we stop eating them once we pass a certain age? Well, that's about to change because I am sharing a classic cookie with you that even the most adulty adult will love!

Peanut Butter & Jelly Cookies
4-5 doz.

Cream Together:
1/2 c. butter
1/2 c. butter flavored crisco
1&1/2 c. crunchy peanut butter
1 c. white sugar
1 c. lt. brown sugar

Add:
2 eggs
1 tsp. vanilla

Sift Together and Add:
3 c. all purpose flour
1 tsp. bkg powder
1/2 tsp. salt
1&1/2 tsp. baking soda

- Combine all ingredients to form a stiff dough.
- Scoop out onto cookie sheet.
- Dip a fork into white sugar and use it to press down on the cookie. First one direction and then in the opposite direction.

To Freeze: At this point you can flash freeze cookies on sheet pan for 2-3 hours and transfer to gallon size ziplock until ready to bake.

To Bake:
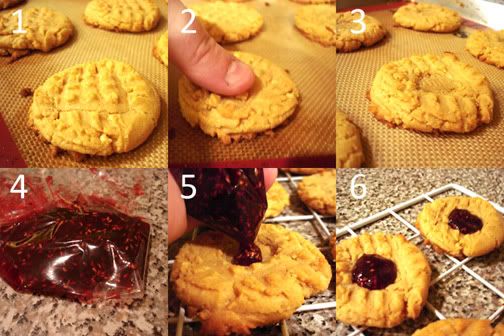
- Bake @ 350* for 8-10 min. Remove from oven and drop pan (as shown in Chocolate Chip Cookie recipe). Fig. 1
- While still on pan and warm, use thumb to press indent in the top of cookie. Fig. 2 & 3
- Transfer to cooling rack.
- Fill sandwich size ziplock baggie with 2-3 T. raspberry preserves. Cut corner off ziplock to create a piping bag. Fig. 4
- Pipe raspberry preserves into indentation on cookie. Fig. 5
- Cool and eat. Fig. 6

Not diggin' the jelly action. Leave it out and just make these amazing Peanut Butter Cookies for the entire family.

Read more...

Em's Chocolate Chip Cookies

July 30, 2008

Here it is.
The moment you've all been waiting for.
The moment you'll thank me for.
The greatest freeze ahead tip evah!
Chocolate Chip Cookie Dough.

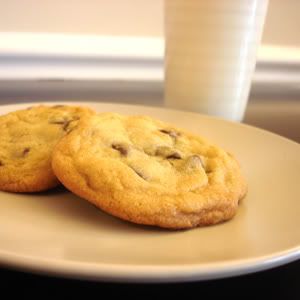
It's true. Mommies of the world rejoice! You have the capability to freeze huge amounts of balls of frozen cookie dough and cook them up whenever you want, straight from freezer to oven, in less than 10 minutes. Do you see the genius here? Mom I need 4 dozen cookies for Boy Scouts? No problem. Mom, Janie is coming over after school and we just want a little snack. Sure thing. I've had a crappy day. All I want are 3 fresh baked cookies. They're yours.

Let's get started. Here's my recipe for freezer chocolate chip cookies.


Chocolate Chip Cookies
(makes 6-7 dozen)

Beat together:
1 c. butter
1 c. butter flavored shortening
1 c. white sugar
1&1/2 c. lt. brown sugar

Add:
3 eggs
1 T. vanilla

Sift into a large bowl:
4 c. flour
2 tsp. baking soda
1&1/2 tsp. salt

- Add wet ingredients to flour mixture and combine with wooden spoon. Add 2 bags chocolate chips. Mix.

To freeze:
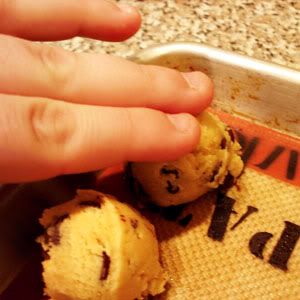
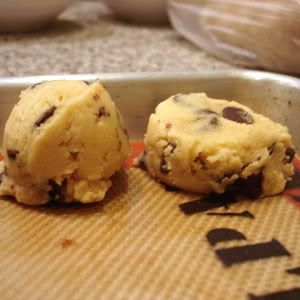
- Use a cookie scoop to scoop out evenly sized balls of dough. Place them about 1/2" apart on a silpat lined baking sheet.


- Use your fingers to slightly flatten balls of dough.


- Place filled cookie sheet, uncovered, in freezer for 2-3 hours or until balls are frozen. Do not leave in for more than 3 hours.


- Remove from cookie sheet and place in a gallon size Ziplock bag. Label and store in freezer.


To cook from frozen:
- remove as many dough balls as you want to bake and place 12 on a cookie sheet.
- Bake at 350* for 8-10 minutes.
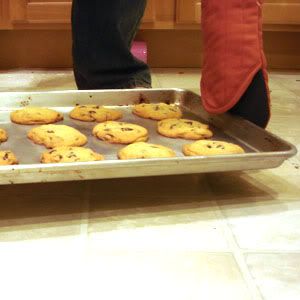
- As soon as you remove them from the oven, hold the cookie sheet 4 inches above the floor (or counter if you have heat safe countertops) and drop the sheet. This releases excess air in the cookies and makes them more moist and chewy. (that's a baker's trick I learned when working in a professional bakery when I was 19 years old)
- Let cool on rack and devour like a crazy person. Yum!


Note: Don't want to use my recipe? Have your own family favorite that everyone loves? Don't worry...I won't be offended. You can freeze your own recipe with minimal changes. The only thing you may want to amend is increasing the flour slightly. Try freezing one dozen as a test first and see if they remain as firm as you like them even after baking. If not, add 1/4 c. of flour next time and see if that does the trick.

You'll soon be the most popular Mom in the PTA. Guarantee it.
Now, this is a recipe that can make you Freeze Happy!

Read more...
Related Posts with Thumbnails

About This Blog

A new recipe will be posted each Monday and, of course, you can always search the archives by category.

The Goal of this blog is not just to give you my recipes, but to teach you which ingredients freeze well, which don't, methods and tips to help you freeze your own recipes...because who knows better what your family likes than you?

Do you only cook organic? Great! Are you a vegetarian? No problem! Make what works for you and save time, money and (let's be honest...stress) while doing it.

The Freeze Happy philosophy has made my life better and I'm pretty sure it can improve yours too.

Legal Stuff

Copyright © 2008-2010 Emilie Ahern. The content on these pages, including text and images are the sole property of the author unless otherwise noted and may not be used or reproduced in any manner without consent. All Rights Reserved.

  © Blogger template On The Road by Ourblogtemplates.com 2009

Back to TOP