Showing posts with label Time Savers. Show all posts

Baby Food : Stage One FRUIT Recipes

October 4, 2010

Stage 1 Homemade Baby Food Recipes are age appropriate for those babies who are between 4 months and 6 months. Many babies start solid foods between 4 months and 6 months so we have included fruits and veggies that your 4 month old beginning eater will be able to tolerate. Of course these recipes are also just yummy for babies who are older as well!

Stage 1 baby foods are thin and runny and are foods that are the lowest on the allergy scale. They are typically those foods that are also more easily digested by a tiny tummy. Some of these foods include, sweet potatoes, butternut or winter squash and carrots.

Please keep in mind that current recommendations advise that babies should start solid foods at 6 months of age.  (wholesomebabyfood.com)

Baby Applesaucemakes 4 1/4 cups or about 48 cubes

4 pounds apples (skins on), washed, cored, and cut into 1-inch pieces
1/3 cup water

- Simmer apples in a large covered saucepan with water until tender, about 10 minutes.
- Transfer mixture to a blender. Working in small batches, blend until smooth. Pass through a fine sieve; for a coarser texture, pass apples through a food mill or pulse in a food processor.
- Fill 1/4-cup plastic containers or ice-cube trays with purée.


Pear Puree
makes 2 1/2 cups or about 28 cubes

3 pounds pears, washed, peeled, cored, and cut into 1-inch pieces
1/3 cup water

- Simmer pears in a large covered saucepan with water until tender, 5 to 10 minutes. Drain; reserve cooking liquid. Transfer pears to a blender.
- Working in small batches, blend until smooth. Add reserved liquid if needed. Pass through a fine sieve for a smooth texture, or mash with a fork.
- Fill 1/4-cup plastic containers or ice-cube trays with purée.


Pear Plum Puree
makes 3 cups or about 30 cubes

1 1/2 pounds pears, washed, peeled, cored, and cut into 1-inch pieces
1 1/2 pounds ripe plums, pitted and quartered
1/3 cup water

- Simmer pears and plums with water in a large covered saucepan until tender, about 10 minutes. Drain; reserve cooking liquid.
- Transfer fruit to a blender. Working in small batches, blend until smooth. Add up to 1/3 cup boiled and cooled water if needed.
- Pass mixture through a fine sieve for the smoothest texture. Fill 1/4-cup plastic containers or ice cube trays with purée.
- Use same method for other fruit combinations.


Stone Fruit Puree
makes 3 cups or about 30 cubes

2 pounds ripe *plums, pitted and quartered
1/4 cup water, plus more as needed

* Use the same method for peaches, apricots, and other stone fruits.

- Simmer plums with water in a large covered saucepan until tender, about 10 minutes.
- Transfer plums to a blender. Working in small batches, blend until smooth. Add up to 1/3 cup boiled and cooled water if needed.
- Pass mixture through a fine sieve for the smoothest texture.
- Fill 1/4-cup plastic containers or ice-cube trays with purée.

Read more...

"Make Your Own Baby Food" Month

October 1, 2010

I am expecting our 3rd baby near the end of this month. And we have all heard that with each baby the parents become more lax, however, I'm getting the hang of this baby thing and now feel a greater push to feed this new little one organic foods and foods free of preservatives as often as possible. Since we now live in an area with an Amish Farmer's Market it was my chance to purchase inexpensive, chemical free fruits and veggies and stock my freezer with good foods for this baby.

Each Monday this month I will be sharing recipes for making your own baby food. It's easy, affordable and healthier than grocery store options. Of course, I will probably still have some of those around, but any amount of change is a good change!


The rules are simple: Steam vegetables until tender, simmer ripe fruits until soft, and poach meats until fully cooked.

Basic equipment: a steamer basket, a blender, a food processor or food mill, and a strainer. Babies should start with silky, smooth purees the texture of runny yogurt. As the months go by, and your baby moves from gumming food to using his or her milk teeth, your purees should become thicker and chunkier; switch to a food processor or food mill fitted with a medium or large disk.

Freeze the baby food in single-serving airtight containers labeled with the ingredients and the date. You can even freeze food in ice-cube trays; for many babies, one cube is enough. To store, transfer frozen puree cubes to a freezer bag. As your baby grows and begins to eat more, increase the size of the containers -- or simply serve two at a time.

Some baby-care books warn against using microwaves, but most mothers we know use one. Because microwaves heat from the inside out, however, food may be hot inside but cool to the touch, so stir the food until no hot center remains. Test it with your finger and mouth; the food should be barely warm or room temperature. If you don't want to use a microwave, you can thaw or warm the food in a saucepan or in a heat-proof bowl over simmering water.

Visit each Monday this month for easy baby food recipes!

Read more...

Freezing Blanched Veggies

September 20, 2010

Often vegetables need to be blanched before freezing. Here is a quick and simple guide for blanching common vegetables. Blanching vegetables helps preserve color and texture.

After blanching vegetables in boiling water immerse immediately into cold water then drain. I often reuse the same water again and again. A large pasta type pot works great for blanching. You can submerse the vegetables into the pot already in the strainer.

Allow approximately a gallon of water for a pound of vegetables. Vegetables will need to cool for the same time as they are blanched.

Preparing Your Vegetables

Peel, trim and cut vegetables into uniform sizes. Look at the chart below to find the time needed. Extra large pieces may need to blanch a minute longer than the table calls for.


Blanching Timetable Chart for Vegetables

Asparagus: Blanch 2 minutes – 3 -4 4 minutes for large asparagus

Beans: green- Blanch for 3 minutes.

Beans: lima, butter or pinto - Blanch small beans 2 minutes, medium beans 3 minutes, and large beans 4 minutes.

Beets: small beets – 35- 30 minute, medium ones 45 – 50 minutes. If you leave the stem on top they won’t bleed into the water as bad.

Broccoli: Blanch 3 minutes.

Brussels Sprouts: Blanch small, 3 minutes; medium, 4 minutes; large, 5 minutes

Carrots: Blanch tiny, whole, 5 minutes; diced or strips, 2 minutes

Cauliflower: Blanch 3 minutes.

Corn: Whole small ears for freezing – 7 minutes, medium ears 9 minutes and large size ears 11 minutes. If you are going to take the corn of the cob for freezing blanch for 4 minutes and remove from cob.

Okra: Blanch small pods 3 minutes and large pods 4 minutes.

Peas: Shelled. Blanch for 1-2 minutes, chill, freeze.

Snap Peas: Blanch 1 1/2minutes

Spinach and other greens: Blanch 2 minutes

Summer squash: Blanch for 3 minutes.

Read more...

Freezing Bread

September 13, 2010


All bread products freeze beautifully. From pitas to tortillas to regular loaves. Here are some tips on freezing loaves of bread.

If you've just baked your own bread or purchased it warm, make sure you allow it to cool before freezing to avoid soggy bread or mold.

To Freeze. Wrap your loaf using two clear plastic bags. Then, seal it using masking tape and place it in the freezer.

To thaw your frozen bread, take it out of the freezer and let it come to room temperature, about 3 hours.
To serve the bread hot, wrap your bread in parchment paper and foil and place it in an oven heated to 400 degrees for 3 or 4 minutes to restore its crisp texture.

Read more...

Freezing Stock

August 30, 2010

Some recipes require just a little stock, and the leftovers from a whole can won't keep forever in the refrigerator. Freezing unused stock or a homemade batch in 1-cup muffin tins makes it easy to store in small amounts.

Use a 1 cup measure to ensure accurate measuring. Fill tins with stock and freeze, covered.

Once they are completely frozen, pop portions out of tin; store them in resealable plastic bags labeled with the date (frozen stock keeps for about two months).

If you need smaller amounts you can also choose to free stock by Tablespoonfuls in an ice cube tray.

*photo from marthastewart.com

Read more...

Fruit Crisp Topping

February 15, 2010

Hmmmm....it's been a while since I shared something sweet, and since Valentine's Day was yesterday I thought it was appropriate.

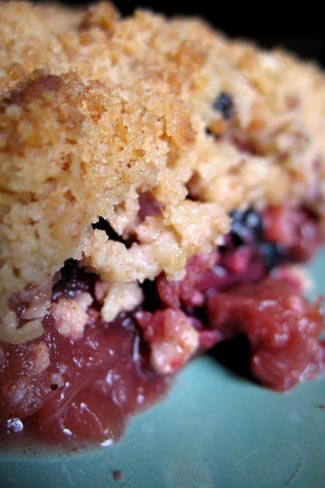
This is a great little trick for whipping up delicious fruit filled desserts in a snap. You can top entire pies with this, fruit crumbles or homemade muffins as well.


FRUIT CRISP TOPPING
Makes 8 cups (enough for 4 - 9 inch pies/crumbles)

1/4 c. + 2 Tbsp. all purpose flour
1/2 c. packed lt. brown sugar
1/2 c. sugar
1 tsp. cinnamon
1/2 tsp. salt
1&1/2 sticks unsalted butter, chilled

Optional
1/2 c. finely chopped nuts (almonds, pecans, walnuts, etc)
1 c. quick oats

To Prepare
- Mix dry ingredients. You can sift together or stir vigorously with a whisk.
- Cut butter into small 1/2" cubes. Use a pastry cutter or knife to break up butter into pea sized (or slightly smaller) balls.
- Flash freeze on a cookie sheet for 1 hour.
- Break up any large clumps with fork or hands.
- Store in small zip lock freezer bags by 2 cup increments (4 bags total). Label with marker.

To Serve (on pies/crisps)
- Sprinkle contents of one bag (or 2 cups) over a 8x8" pan of sweetened fresh or frozen fruit or on top of a crustless 9 inch pie.
- Bake at 375* for 40 minutes

To Serve (as muffin topper)
- Prepare any muffin recipe.
- Sprinkle 2 Tbsp. of crumble on top
- Bake per your recipe instructions.

Read more...

Reader Question: Freezing Pizzas

October 12, 2009

Today I wanted to answer a great reader question. Katy B asks...

Q: I wanted to email you to ask about freezing pizzas, so when I checked your site and saw the pizza dough I thought you had read my mind! What I'd like to know though, is if it is possible to create frozen pizzas. I'd like to premake some individual sized pizzas for my son and pop them in the oven - - if it's possible to do that at home, what tips should I be aware of?? Or what's the very most I could freeze together - perhaps just dough with sauce on it or any toppings, but no cheese (to be then added later).


A: The difficulty with freezing entire pizzas is the sauce. You would have to experiment a lot with different sauces. The problem is that tomato sauces have all different amounts of water content based on the tomatoes used. For instance, my hubby and I prefer a very fresh tasting red sauce, but that does not freeze well since fresh tomatoes will expel a lot of water when baked from frozen. So you have to experiment with sauces with a much more pasty base. Where the water content has been reduced prior to freezing by using sauce more resembling tomato paste.

Yes, it can be done, but might require work on your part and the consuming of a lot of watery pizzas. Please let me know if you find one that works!

Read more...

Happy Birthday to ME! Cake Freezing.

September 21, 2009

Today is my 32nd birthday.
{pause for applause}

And in honor of that I am going to share a fabulous tip for freezing baked cakes.
Yes, a lot of the bakeries do it and here's how to make it successful.


To Freeze
- Bake a cake as you normally would and cool completely (I always use cakemix, but you can bake from scratch if you prefer).
- Cut into layers if desired.
- Wrap each layer tightly in plastic wrap.
- Then stack layers together and wrap tightly into one cake with plastic wrap.
- Label and freeze for up to 4 months.

To Serve
When you're ready to serve simply remove cakes and allow to thaw slightly on kitchen counter. You have no idea how much easier it is to frost a slightly frozen cake! Add filling and frost and then store in refrigerator or on counter until ready to serve.

Another Tip
For an even easier and tasty alternative, before freezing fill layers with real whipping cream, put cake into layers, wrap and freeze. This is like a huge Whoopie Pie and can be eaten still slightly frozen, cool or completely thawed. You can eat it plain, frost it with regular frosting or you can also top with fresh berries or canned fruit pie filling.

This is such a useful trick for church potlucks, unexpected classroom parties and last minute visitors. So bake up a few cakes today and freeze them for later...you'll be glad that you did!

Read more...

REAL Whipped Cream On The Go!

March 9, 2009

This tip is dedicated to my Mother, the whipped cream champion of the world. I don't think Cool Whip passed my lips until I was in my 20's.

FREEZING REAL WHIPPING CREAM
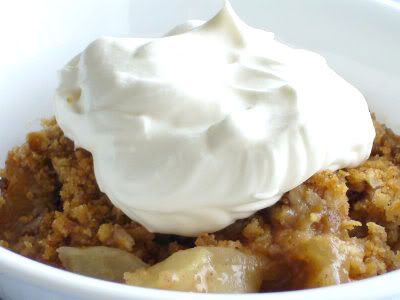
You can freeze real whipping cream and use it to top deserts and hot cocoa and anything else you can think of, without having to whip an entire container of whipping cream every time!

1 cup heavy cream/whipping cream (the WalMart house brand is wonderful)
1 tsp granulated sugar

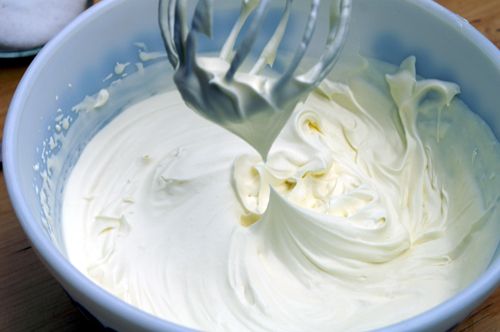
- In a large bowl combine ingredients and beat with hand mixer until it begins to form peaks. (That means when you stop the beaters and lift them straight out of the cream, a peak forms and folds over slightly...as shown below.)


- Line a cookie sheet with wax paper. Dollop whipped cream onto the cookie sheet in single-serving sizes of your preference. If you want to get really fancy and impress your Mother-In-Law, pipe whipped cream out using a pastry bag fitted with a large star tip*.

- Flash freeze on cookie sheet. Then transfer to a ziploc freezer bag or freezer container.

To Serve: You only need a few minutes to allow it to thaw, which you can usually do right on the dessert.


*Please Note: Now, I'm going to tell you this because I love you and we've reached a certain level of trust in our relationship. Please, if you must pipe, don't make the common mistake (spurred on by legions of Semi-Homemade With Sandra Lee fans) of just snipping the edge off of a plastic bag. This results in a very unattractive snake-like appearance which, when piled into a deviled egg or topped on your delightful dessert, looks remarkably like kitty poo. I'm sorry, I just had to say it.


(Don't do this)

Read more...

About Puff Pastry

November 7, 2008

Let's talk about Puff Pastry.
It's one of your best friends in your quest for Freezer Domination.
Why?
Because it is incredibly versatile.


It can be sweet, savory, main dish, side dish, bread, dessert, appetizer...anything!
And it freezes like a dream.
{sigh.}
It must be love.

Get ready to see this versatile ingredient a lot here in the future.
From Beef Wellington to cherry turnovers. And bread sticks to fancy appetizers.

Read more...

15 Uses for Pesto

October 16, 2008

So, you've got your pesto made and all frozen. Now, what do you do with it? Here are 15 ways to make that Pesto sing. And stay tuned for one more fun and fabulous Pesto idea later this week. You'll LOVE it!


1. For pasta, toss a few tablespoons of pesto with hot pasta and a bit of the cooking water until well coated. Also try adding roasted asparagus and cooked chicken to the dish for a heartier meal.

2. Upbeat Soup. Stir a teaspoon of pesto into a bowl of piping hot soup just before serving as a colorful and tasty garnish.

3. Refresh Fish. Allow a bit of pesto to melt over the top of broiled fish or steamed veggies.

4. To make a terrific appetizer, lightly toast slices of French bread. Toss some diced tomatoes and artichoke hearts into your pesto, spread on a thin layer of pesto and pass under a broiler until it is hot and bubbly.


5. Mix some into mayo for an awesome sandwich spread. Great for waking up a turkey sandwich or adding another dimension to an Italian cold cut sandwich.

6. Top it off. You might also spread a layer of pesto over your pork chops or steaks just before you finish broiling them.
7. Better Bread. Or make your favorite bread recipe. Roll it out like pizza dough, spread on pesto and roll it up as if you were making cinnamon rolls. Bake as usual.

8. Or create a fancy-shmancy pizza by replacing the regular tomato sauce with pesto.


9. Add vinegar, olive oil and pepper, and you'll have a wonderful vinaigrette dressing for your salads.

10. Marinade. Rub beneath skin of a whole chicken or chicken breast and bake as usual.

11. Add it to your eggs before cooking your next omelet.

12. Mix a little in with your chicken salad.

13. Healthy Alternative. Brush it on roasted or boiled corn on the cob in lieu of butter.


14. Better Burgers. Mix with ground beef (or ground turkey) and make hamburgers on the grill. Outstanding!

15. Pesto Potato Salad. Boil red potatoes. Mix potato slices and chopped sauteed onion. Add 2 or 3 chopped tomatoes, red onions, then mix olive oil, some vinegar, salt, pepper and pesto to form a nice dressing and pour over potato salad. Should marinate for an hour or so.


Read more...

Freezing Cooked Rice

July 17, 2008

Rice can take quite a significant amount of time to cook, especially the brown rice that we like. And I hate the taste of quick rice. So you will be happy to know that you can freeze rice for later!
You just need to follow a few important steps before freezing to ensure the quality is still good when you go to thaw and re-use it in a later dish.


Instructions:
- Cook your rice as usual.

- Allow to cool at room temperature, then place in refrigerator. Allowing the rice to chill will avoid the problem of mushy rice when you thaw it.

- After the rice is chilled in the fridge, transfer rice to freezer bags by one or two cup incriments. Label and freeze.


To Reheat: simply thaw in refridgerator and reheat in microwave!

Read more...

Pre-Cooked Ground Beef

July 11, 2008

No, I haven't given up on this blog. Our family just moved from Utah to Delaware and I was without computer for more than a week. I still have to unpack our kitchen, so no new recipes for a few more days...however, today you will learn something invaluable to your Freeze Happy lifestyle. Pre-Cooking ground beef.


Here's what you'll need.

5-8 lbs. raw ground beef
2 cups finely diced yellow onion
2 Tbsp. minced garlic
1 cookie sheet
Silpat Mat or Wax Paper
Small Ziplock bags
Sharpie Marker


1. Get a huge non-stick pot, like the kind you might make soup in.
2. Cook the onion and garlic on medium heat for 3-5 minutes.
3. Add your ground beef and cook until completely done. Drain any excess fat.

Now here's where I'm gunna get all Food Safety Inspector on you. The temperature in which bacteria grow is the luke-warm temperature. therefore, any time you are cooling meat you want to chill it as quickly as possible. This explains your next step.

4. Line a cookie sheet with a silpat mat (or wax paper). Lay out your beef in an even layer.
5. Place in freezer, uncovered, for 4 hours.
6. Use a Sharpie marker to label ziplock bags with date.
7. Use a cup measure to measure out 2&1/2 cups into each ziplock bag. Store in freezer.

Now here's what's so genius about this. 2&1/2 cups of cooked ground beef equals 1 pound of ground beef in a recipe.

So let's say it's 5:00 pm and your day was so stressful that you have no dinner planned for tonight. Grab a jar of your favorite jarred marinara sauce. Boil pasta noodles you have in your pantry. While the pasta is cooking, throw your marinara in a medium pot and add one of your packets of hamburger straight from your freezer. Cook on medium heat until heated through. Voila! In 15 minutes you have a filling, warm and easy meal. What could be better?

Also try adding your precooked meat to...
- Canned soup
- Chili
- Casseroles
- And anything else you can think of.

Pre-Seasoned Variation: When your cooking your meat in step 3, put half on a cookie sheet to freeze and leave the other half in the pan. Then add 1-2 taco seasoning packets and place to freeze on a separate cookie sheet. Then you or your kids can simply throw a seasoned meat baggie straight into the microwave and have instant taco meat. Genius right? I know.

Healthy Version: And of course, for the Health Conscious you can choose how lean you want your beef or do this with ground turkey or (for picky families) you can combine a mixture of lean ground beef and ground turkey.

Read more...
Related Posts with Thumbnails

About This Blog

A new recipe will be posted each Monday and, of course, you can always search the archives by category.

The Goal of this blog is not just to give you my recipes, but to teach you which ingredients freeze well, which don't, methods and tips to help you freeze your own recipes...because who knows better what your family likes than you?

Do you only cook organic? Great! Are you a vegetarian? No problem! Make what works for you and save time, money and (let's be honest...stress) while doing it.

The Freeze Happy philosophy has made my life better and I'm pretty sure it can improve yours too.

Legal Stuff

Copyright © 2008-2010 Emilie Ahern. The content on these pages, including text and images are the sole property of the author unless otherwise noted and may not be used or reproduced in any manner without consent. All Rights Reserved.

  © Blogger template On The Road by Ourblogtemplates.com 2009

Back to TOP