Mini Pancakes

June 26, 2008

This is a great recipe to start off your freezing with. It's easy, cheap and the kids just LOVE 'em! And I do too.

Start out with making standard pancake mix. I usually triple the batch amount. My kids really love these. Use whichever mix or recipe you like. Whole Wheat, vegan, whatever. My favorite is Krusteaz. Just add water? Perfect!


You'll also need a cookie sheet, measuring spoons and a silpat mat. Heat your griddle to 350* or a frying pan to medium/high. To make mini pancakes just scoop out circles, 1 Tbsp at a time. When I do this on a griddle I leave one row open so I can flip more easily.


By the time you have scooped out an entire griddles worth, the first rows should be about ready to flip. Flip them when most of the surface is covered with bubbles.

Then line remove them from griddle and place them straight onto a cookie sheet lined with a Silpat. You may place them close together. Continue making mini pancakes and piling them on until all of your mix is used up...adding additional layers on your baking sheet.


Place baking sheet into the freezer (uncovered) to flash freeze for 1 hour.


Remove from freezer and place mini pancakes into a gallon size freezer bag, label and store.


To reheat:
Place desired amount of pancakes in one layer on a microwave safe plate or a paper towel. Cook for 5 second increments, checking for warmth after each 5 seconds until all are warmed through.
I like to serve these with two little bowls for kids to dip in. One of maple syrup and one with raspberry jam. We have also taken these on the road with our kids and made a little sandwich out of two pancakes with a bit of sugar free jam in the middle. Delicious!
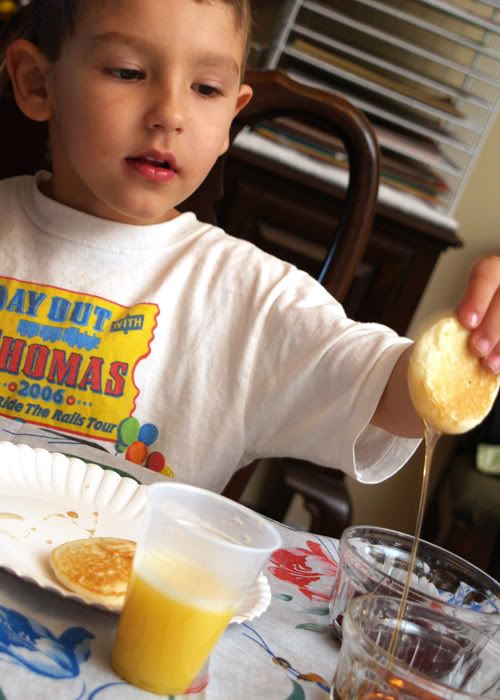

Our friend Bradley, enjoying the dipping.

Note: You can totally make these into "adult size" pancakes and flash freeze them just the same way. Store in a ziplock bag with pieces of wax paper in between each pancake. But seriously...why would you when the mini pancakes are so cute?

Read more...

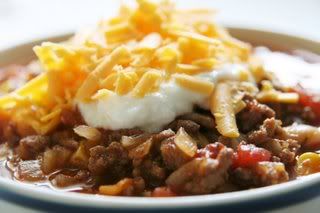
Toby's Taco Soup

June 21, 2008

I got this recipe from a real Rancher I knew once. His parents ran a ranch and in the Summer they hired a gazillion Ranch hands to "run" the cattle. This recipe has been cut down by about 10 times, since Toby's mom made it for about 25 starving ranch-men. It has been a staple in our family ever since I got it. Thanks Toby!

Ingredients
1-2 lbs. ground beef
1/2 c. chopped onion
1 can pinto beans
1 can black beans
1 qt. tomato juice
1 pkg. taco seasoning
salt/pepper

optional additions
2 c. frozen corn
1 can diced tomatoes


Directions
- In a large pot brown meat and onions, drain if needed.
- add taco seasoning packet. Stir to coat beef mixture.
- Dump in remaining ingredients.
- Bring to boil. Leave at hard boil for 30 minutes, uncovered.
- salt and pepper to taste.
- to serve top with shredded cheddar cheese, black olives,sour cream, green onions and taco chips.


To Freeze
- portion out individual servings by spooning soup into ziplock disposable bowls. DO NOT COVER with lids. Place on cookie sheet and flash freeze in freezer for 4 hours. Write "Taco Soup" on lids with permanent marker adding a green sticker. Cover with lids. stack in freezer.


To Reheat
From frozen: Open one edge of lid to vent. cook in microwave on high for 2 minutes. Stir. Continue cooking in two minute intervals (stirring in between) until desired temperature. Add toppings or eat plain.

Read more...

Chicken Parmesan

Ingredients:
6-8 chicken tenders
1/2 c. italian style breadcrumbs
1 c. grated parmesan cheese
1 egg
(or substitute store bought frozen tenders for first 4 ingredients)

1&1/2 c. grated mozzarella
1 jar marinara sauce (or 3 cups frozen)
1 disposable aluminum 8x8" square pan
salt and pepper

The prep:
- put shredded mozzarella into small ziplock baggie
- put jarred marinara sauce into a ziplock baggie.
- spray bottom of aluminum pan with non-stick cooking spray
- combine bread crumbs and parmesan cheese
- whisk 1 egg with 1 T. water to make an egg wash.
- salt and pepper each side of the chicken tenders
- dip each chicken tender in egg wash to coat and then into cheesy crumbs until coated.
- place in pan. they can be touching, but be careful not to overlap the chicken too much. Your creating one layer in the bottom of the pan.

To freeze:
- lay ziplocks of cheese and sauce on top of chicken, laying each as flat as possible. With a Sharpie, write cooking directions on piece of aluminum foil large enough to cover pan. Add a green sticker.
- Cover pan with foil. Freeze.


Cooking Directions:
- To cook from Thawed. Bake chicken tenders in pan @ 400* for 10 minutes until they are browned and crispy. Add marinara sauce and top with cheese. Cook an additional 5-10 minutes until sauce is hot and cheese is melted.

- To cook from Frozen. Bake chicken tenders in pan @ 350* for 15-20 minutes until they are browned and crispy. Add marinara sauce and top with cheese. Cook an additional 5-10 minutes until sauce is hot and cheese is melted.

- Serve with pasta and a side salad or place chicken parmesan onto toasted hogie rolls and top with fresh spincah leaves for a chicken parm sub. Now you're cooking!

Read more...

Beef Tamale Pie

an original recipe by Emilie Ahern

1 lb. ground beef
1/2 c. minced onion
1 Tbsp. minced garlic (3 cloves)
1 small can tomato paste
1 pkg. taco seasoning
1 (28 oz.) can diced tomatoes
1 can black beans (rinsed)
1 small can green chilis
1 c. frozen corn
juice from 1 lime
fresh cilantro
8 oz. shredded cheese
1 box jiffy corn bread mix

- In large pot, brown beef with chopped onions. Add garlic and cook for 2 minutes. - Add all other ingredients through cilantro. Mix well. - Pour into 9x13 pan. Top with shredded cheese. - Make cornbread according to package directions. Spread onto top of casserole. - Bake at 375 uncovered for 35-45 minutes or until cornbread is browned and filling is bubbly.

OR cover tightly with foil, writing directions on foil with marker and adding a green sticker, and freeze.

- To cook from frozen uncover and let sit at room temp for 30 minutes. Then cover with foil and bake at 375 for 30 minutes. Then uncover and bake for an additional 45 minutes or until cornbread is browned and filling is bubbly.

STEP-BY-STEP

Let's get started. brown 1 lb. of ground beef with one chopped onion in a large saucepot.


after it's browned and drained, add 1 tbsp. garlic and cook for two minutes.

1 packet of taco seasoning,

now you add lots of stuff:
1 28 oz. can of diced tomatoes
1 small can of tomato paste
1 small can of diced green chiles.

next comes chopped cilantro. i don't love cilantro so i don't use very much. for my double recipe i used less than half of what is pictured here. even if you don't like it, i recommend you add it. it really adds to the taste of this yummy casserole.

1 cup of frozen corn

the juice of one lime. the lime juice gives it a kick that is deLISH.

1 can of black beans, drained and rinsed,
stir it all together and it should look something like this:

make sure you have your pans ready. i use the throw-away ones when i take food to people, then i don't have to worry about getting them back. i also use them for freezing things so i'm not out a pan when i need it.
now add the mixture to your pan by the cupful until it's almost to the top. smooth it out with the bottom of your measuring cup so it's mostly even.
ignore the manhands.
that explanation wasn't descriptive enough, so here's a picture of the smoothed-out casserole:after it's all smoothed out, add cheese. i use the pre-grated kind 'cause it's faster, but you can grate your own if you're so inclined. add lots. cheese = yum.see? lots.
now you have to make the cornbread topping. mmmm, cornbread. you just need one box if you're doing the single recipe, but if you're doubling it (and making three casseroles), you'll need three boxes. two isn't quite enough, and three is too much, so there is a little bit of waste. i guess you could make muffins or something. i just dumped mine out. don't badger me about starving children in africa. i know. i cannot send those children a little bit of cornbread and we wouldn't have eaten the muffins, so there.

first, pour the mix in the bowl. no picture of that, sorry...you'll just have to imagine what that looks like.
then add an egg.
then add 1/3 cup of milk.
mix together and pour on top of the cheese.
smooth it out with a spoon,
and try not to drip it over the edge, like mine is about to do in this picture.now get some foil, and write the contents and cooking instructions with a sharpie. i like the clicker kind, but i'll let you decide which sharpie to use.
then turn it over, spray it with pam,
and cover your freezer-casserole, instructions-side-up.

then bake the non-freezer version at 375* for 30-40 minutes, or until cornbread is browned and filling is bubbly. word to the wise: you may want to put a layer of foil underneath, or else it could drip onto your newly cleaned oven.

Serve with sour cream and devour like a crazy person.

this picture was taken about 7 hours after i made it (it's the left-over plate) so it's cold and doesn't look nearly as delicious as it should. but of course, i forgot to take a picture of the finished product when it was still hot. i had visions of green chile and cornbread dancing in my head.
so there you have it. try it, you won't regret it!

Read more...

About Freeze Happy

June 20, 2008

I've tried it. Many of you have tried it too. Those make-ahead-dinner companies that seem like a dream come true. Save time, money and get all of your meals cooked and ready in one afternoon.

The problem?

Unfamiliar recipes....recipes my family wouldn't really eat.
Incomplete meals...these places only offer the main dish.
Expense...paying for a facility & employees drive up the cost.

So I set out to do it on my own. I read everything I could about freezing meals. What freezes well. How long will it keep. Food safety standards. Collecting and testing recipes.

Shortly after beginning my fact finding, my sister was diagnosed with thyroid cancer. After going through radiation, her recovery time would make it difficult to get meals on the table for her husband and four children. I bought supplies, wrangled recipes and all of the knowledge I had acquired and at the end of two days I had made enough main dishes, sides and desserts for her family to last for 6-8 weeks. It was great (although they were guinea pigs for a few new recipes that didn't exactly pan out...sorry guys!) and they had a home cooked meal every night for over a month.

After teaching a few local classes on this and sharing recipes with many friends, they all requested a website with cataloged recipes and tips. So here it is! A new recipe will be posted each Monday and, of course, you can always search the archives by category.

The Goal is not just to give you my recipes, but to teach you which ingredients freeze well, which don't, methods and tips to help you freeze your own recipes...because who knows better what your family likes than you? Do you only cook organic? Great! Are you a vegetarian? No problem! Make what works for you and save time, money and (let's be honest...stress) while doing it.

The Freeze Happy philosophy has made my life better and I'm pretty sure it can improve yours too.


So, just who is writing this?

I am a 30+ year old wife and a mommy of three little girls, Ella (5), Evangeline (3) and Bianca (newborn). I live in Lancaster County, PA with my hubby Matt, where he works as a Health Administrator and where I am a Stay-At-Home-Mommy and a part time Professional Photographer.


I am an artist. I oil paint, knit, sew and do various other crafty things along with a bit of graphic design (mostly for business blogs). I would much rather play with fabric than cook a dinner, although I am a serious foodie.

Freezing meals gives me time to play with my kids, my crafts, my girlfriends and my hubby. And what's more valuable than time?

Read more...

Where do I start?

June 19, 2008

Good question.

I would start by reading the Freezer Food Safety post and then visit the Tools section of this blog. Then you will know exactly what is needed to get you started...and trust me...you already have most, if not ALL, of it already! Then, I suggest you try freezing just one thing. Start with an easy recipe like my mini pancakes or chocolate chip cookies or cooked ground beef.

You'll get a good feel for how this process works and how to best make it suit your lifestyle.

Then you can continue to try a few more recipes. Once you get rolling, you'll be ready for a full blown freeze-a-thon day where you make a gazillion meals to stock your freezer. Pop in a good CD and invite a girlfriend (or two...or five) over to Freeze Happy with you. It's a win/win. Seriously sister.

ALL posts in the Freeze-A-Thon series...
Freeze-A-Thon Part I - Organization
Freeze-A-Thon Part II - Preparation
Freeze-A-Thon Part III - Execution
Freeze-A-Thon Part IV - Utilizing Your Frozen Foods

Read more...

Helpful Tools

June 17, 2008

The Basics

- Gallon Size Ziplocks for storing already frozen bulk small items like cookie dough, meatballs, pancakes, etc.
- Sandwich Size Ziplocks for storing chopped ingredients in your fridge or packaging components in frozen meals
- Sharpie Marker for labeling frozen items and writing directions on meal packets
- Measuring Cups and Spoons for completing recipes and for portions
- Cooking Spray for prepping foods, making aluminum foil non-stick and covering finished meals
- Large mixing bowl for prepping foods
- Small disposable soup bowls/small Tupperwares for freezing and storing individual soups
- Cookie Sheet/Sheet Pan for flash freezing items
- Disposable Aluminum Pans in 8x8 size and 9x13 (or larger). Buy these from a restaurant supply store or from Sam's Club.
- Circular colored labels like this kind you get at Walmart or Staples. These are vital for identifying which meals must thaw first in the refrigerator and which can go straight from freezer to oven. Here's my system.

Green means GO. Go straight from freezer to oven.
Red means stop. Stop! You must thaw this before cooking.


The Extras

- Silpat Mat* (or wax paper) for creating a nonstick surface for flash freezing items
- A chest or stand-up freezer No, it's not a must, but once you get into the groove of Freeze Happy, you'll want to make a gazillion meals for yours and other families. The more space the better!
- Counter space Also not a necessity, but when you're hosting a meal-a-thon you'll really love to have extra space.


* A Silpat Mat is a silicone mat made to fit perfectly into a standard size cookie sheet. It is completely nonstick and allows flash frozen food to be removed easily from pans without tearing. They are expensive, but I highly recommend owning two. They last forever, can be washed and will make you feel like Martha Stewart. Priceless.


Recommended Reading

- The Best Make Ahead Recipe by Cook's Illustrated Magazine. I really like this book. The concept is exactly what I like, teaching you and giving you enough information to start freezing your own recipes...not just theirs. However, many of the recipes in this book are not for freezing, but for prepping a day or two ahead and keeping in the fridge. But that's good too, right? Still totally worth it.

Read more...

Contact Freeze Happy

June 16, 2008

I love hearing from YOU!
Drop me an email anytime with
questions, suggestions or comments.

Please DO NOT email and ask how long foods keep in the freezer.
That information can be found here.

Email me at  
eahern (at) live (dot) com
.
.
.

Read more...

How Long Foods Keep + How Foods Freeze


How Long Will it Keep?

The general rule for frozen meals is 3-6 months.
Have I waited longer?...yep.
In fact one day a year I make homemade turkey meatballs and my Ukrainian Grandmother's pierogies in a 14 dozen amount. Yep...14 dozen. And it lasts us an entire year and they are great until the end.

What I generally do is when I am making a dinner I make enough for 3 meals and freeze two of them. Then each Monday is Make-Ahead-Monday. On Sunday I pull one out of the freezer to thaw it in the refrigerator. Then we have it for dinner on Monday and that makes clean-up easy and fast since my house is always a wreck after the weekend.

This keeps your frozen meals in constant rotation.

. . . . . . . . . . . . . . . . . . . . . . . . . . . . . . . . . . . . . . . .
Food that Freeze Well

Cheeses

(on their own)
Part Skim Mozzerella
Parmesan

(in a recipe)
Cheddar
Monteray jack
Part Skim Mozzerella
Parmesan

Breads
Any variety of store-bought bread.
Homemade bread.
Tortillas
Pitas
Puff Pastry
Pie Crust

Dairy
Sour Cream (in a recipe)

Soups/Stewsbroth based soups


Foods that thaw into a Grossy-Gross Mess


Dairy
dairy based sauces
sour cream (alone)

Cheeses
most cheeses on their own except mozzarella and parmesan.

Fruits/Veggies
watery vegetables and fruits like tomatoes, peppers, lettuce, etc.

Soups/Stews
cream based soups

Read more...

Measurements

June 15, 2008

What the recipe says = What you'll need

1 pound ground beef = 2 & 1/2 cups cooked ground beef.
1 medium onion = 1/2 c diced onion
1 clove garlic, minced = 1 tsp jarred minced garlic
1 Tablespoon of fresh herbs = 1 teaspoon of dried herbs

Read more...

Substitues for Alcohol

June 14, 2008

Contrary to what most people believe, and that includes most professionals, when using beer, wine or other alcoholic beverages in recipes, a lot of alcohol is left after cooking. Here are the facts from the Agricultural Research Service of the USDA (1989).

Alcohol remaining after preparation:
100% Immediate consumption
70% Overnight storage
85% Boiling liquid, remove from heat
75% flamed

Alcohol remaining after being baked or simmered:
40% 15 min.
35% 30 min.
25% 1 hour
20% 1.5 hour
10% 2 hours
5% 2.5 hours

.............................................................................................................

Suggested substitutions for Alcoholic Beverages in Recipes
Choose the substitute considering the sweetness of the dish you are preparing. Many times for a savory dish I just add additional stock.

White Wine substitutes in recipes
• Apple juice or carrot juice.
• Vegetable stock or Chicken stock straight or with a little white wine vinegar
• 1/2 cup rice vinegar and 1 tablespoon white grape juice.

Red Wine substitutes in recipes
• 1/2 cup of grape juice with 2 teaspoons of red wine vinegar.
• 1/2 cup water and 2 teaspoons of balsamic vinegar.
• Gerber single serving size cherry juice for babies.
• Beef stock or chicken stock straight or with a little red wine vinegar.

Champagne substitutes in recipes
• Ginger ale, sparkling grape juice.Brandy substitutes in recipes
• Apple juice, peach juice, white grape juice, pear juice.

Marsala substitutes in recipes
• Orange juice
• Peach juice
• Pear juice

Orange Liqueur substitutes in recipes
• Frozen orange juice concentrate.

Beer substitutes in recipes
• Chicken broth
• Beef Broth
• Ginger Ale
.
.

Read more...
Related Posts with Thumbnails

About This Blog

A new recipe will be posted each Monday and, of course, you can always search the archives by category.

The Goal of this blog is not just to give you my recipes, but to teach you which ingredients freeze well, which don't, methods and tips to help you freeze your own recipes...because who knows better what your family likes than you?

Do you only cook organic? Great! Are you a vegetarian? No problem! Make what works for you and save time, money and (let's be honest...stress) while doing it.

The Freeze Happy philosophy has made my life better and I'm pretty sure it can improve yours too.

Legal Stuff

Copyright © 2008-2010 Emilie Ahern. The content on these pages, including text and images are the sole property of the author unless otherwise noted and may not be used or reproduced in any manner without consent. All Rights Reserved.

  © Blogger template On The Road by Ourblogtemplates.com 2009

Back to TOP