Freezing Food Safety

December 28, 2009

There are some important things you need to know about food safety if you really want to dive into Freezer Cooking.


What Can You Freeze?
You can freeze almost any food. Some exceptions are canned food or eggs in shells. However, once the food (such as a ham) is out of the can, you may freeze it. Ummm...Ham in a can? Gross.

Being able to freeze food and being pleased with the quality after defrosting are two different things. Some foods simply don't freeze well. Examples are mayonnaise, cream sauce and lettuce. Raw meat and poultry maintain their quality longer than their cooked counterparts because moisture is lost during cooking. For my list of freezables click here.

Does Freezing Destroy Bacteria & Parasites forever?
No. Freezing to 0 °F inactivates any microbes -- bacteria, yeasts and molds - - present in food. Once thawed, however, these microbes can again become active, multiplying under the right conditions to levels that can lead to food borne illness. Since they will then grow at about the same rate as microorganisms on fresh food, you must handle thawed items as you would any perishable food.

Packaging

Proper packaging helps maintain quality and prevent "freezer burn." It is safe to freeze meat or poultry directly in its supermarket wrapping but this type of wrap is permeable to air. Unless you will be using the food in a month or two, overwrap these packages as you would any food for long-term storage using airtight heavy-duty foil, (freezer) plastic wrap or freezer paper, or place the package inside a (freezer) plastic bag. Use these materials or airtight freezer containers to repackage family packs into smaller amounts. It is not necessary to rinse meat and poultry before freezing. Freeze unopened vacuum packages as is. If you notice that a package has accidentally been torn or has opened while food is in the freezer, the food is still safe to use; merely overwrap or re-wrap it.

Safe Defrosting
Never defrost foods in a garage, basement, car, dishwasher or plastic garbage bag; out on the kitchen counter, outdoors or on the porch. These methods can leave your foods unsafe to eat.

There are three safe ways to defrost food: in the refrigerator, in cold water, or in the microwave. It's best to plan ahead for slow, safe thawing in the refrigerator. Small items may defrost overnight; most foods require a day or two. And large items like turkeys may take longer, approximately one day for each 5 pounds of weight.

For faster defrosting, place food in a leak proof plastic bag and immerse it in cold water. (If the bag leaks, bacteria from the air or surrounding environment could be introduced into the food. Tissues can also absorb water like a sponge, resulting in a watery product.) Check the water frequently to be sure it stays cold. Change the water every 30 minutes. After thawing, cook immediately.

When microwave-defrosting food, plan to cook it immediately after thawing because some areas of the food may become warm and begin to cook during microwaving.

The temperature of your cooked meats really matters.
Really the best way to determine if a cooked meat is done is not the cooking time of the recipe, but the internal temperature of the meat. This provides two great results. Avoiding under cooking the meat means less food born illness and avoiding overcooking the meat mean more moist, juicy meats.

The amount of time your food it takes your food to cool is important.
Bacteria grows most easily at a certain temperature. The danger zone of bacteria growth is luke warm. So, when you're cooling down or freezing your food yo must change the temperature from warm to cold in the quickest way possible. For instance, if you were freezing soup, rather than putting in your freezer in a deep pot, you should spread it out into a shallow dish so that it all comes down in temperature more quickly. This also mean you should not cover meat if storing in the fridge until plastic wrap covering it would not accumulate steam. Put it into the fridge uncovered until cool. Never stack packages to be frozen. Instead, spread them out in one layer on various shelves, stacking them only after frozen solid

Cross Contamination
If you've been in food service you know the drill. You should not cut raw meat and raw veggies with the same knife or on the same cutting board. Doing so can transfer harmful bacteria from one food to another. As a general rule you should always use the above rule, but it's especially important when assembling freezer meals because it's a time when you are much more likely to be chopping these foods at once since we are assembling meals.

*Most information from the USDA website.

Read more...

Artichoke Canapes

December 21, 2009

I love artichokes and they seem to be an ingredient that is not largely a staple in American cooking. Therefore, when you serve them to your guests it seems like an extra special treat. You know how I love frozen puff pastry for easy and sophisticated freezer items and this recipe is no different. Easy, impressive and delicious! And wouldn't these be perfect for your upcoming New Years Eve party? I think so.


Hot Artichoke Canapes
Makes 32 puffs

1 can (12 oz) artichoke hearts, drained well & chopped
1/2 cup mayonnaise
1 clove garlic, minced
3 tbsp grated Parmesan cheese
3 tbsp chopped fresh parsley
1 pkg (17.25 oz) frozen puff pastry, thawed
Egg Wash (1 egg, beaten with 1 tbsp water)

To Prepare
- In medium bowl, combine artichoke hearts, mayonnaise, garlic, Parmesan cheese and parsley; set aside.
- On floured surface, unfold sheet of puff pastry. Crimp seams with fingertips. Roll sheet to 12-inch square. Brush with egg wash.
- Cut pastry sheet into 16 (3-inch) squares. Place small amount of artichoke filling in center of each 3-inch square. Fold 2 side corners up to encase filling.
- Place canapes on parchment-lined baking sheet. Brush each with egg wash mixture. Repeat with puff pastry sheet and remaining filling.

To Freeze
- Cover with plastic wrap and flash freeze. Remove from sheet pan and place carefully in gallon ziplock bag until ready to cook.

To Serve
Take straight from freezer and place on ungreased cookie sheet. Bake in 400 degree F oven for 13-15 minutes or until browned and puffed. Serve warm or at room temperature.

Read more...

Spinach Artichoke Dip

December 14, 2009

I love a good spinach artichoke dip. The low fat ingredients in this recipe make it better for you, but also avoids separation of fats when thawed and cooked. Having this recipe in the freezer makes Superbowl parties, holiday gatherings or Saturday night dinners a breeze!


Spinach Artichoke Dip

10 oz pkg. frozen chopped spinach, thawed and drained
2 cups lowfat sour cream
8 oz. pkg low-fat cream cheese
1 cup part skim mozzarella cheese
1/2 cup grated Parmesan cheese
1 can artichoke hearts (in water), drained and chopped
1 tsp fresh black pepper
1 minced garlic clove
1 teaspoon chili pepper flakes (optional)

To Freeze:
- Combine all ingredients together well.
- Divide into 4 portions and store in 2 cup containers. Freeze.

To Prepare:
- Bake it at 350 degrees, stirring once or twice, until heated through (probably 40 minutes) OR heat in microwave until heated through, stirring every 60 seconds.

To Serve:
Serve with tortilla chips, toasted rounds of baguette or pita wedges.

Read more...

Mini Appetizer Quiches

December 7, 2009

I hope all of my American readers had a fantastic Thanksgiving! Mine was stupendous for many reasons, not the least of which was the food.

And now, December is here and the holiday season is in full swing. The holidays are a wonderful time, but can also be a stressful time. I want to share recipes this December that can help make your holiday entertaining and family get-togethers easier and less-stressful.

I am going to start with a recipe for party appetizers. This little quiches are wonderful served as appetizers at a holiday party. You can make them ahead of time and freeze them; they reheat beautifully.


Quiches are completely customizable, meaning you can make some for vegetarians, some for picky eaters and some that are filled with upscale ingredients...depending on your audience. Another great thing about a mini quiche is that on a buffet it is not needed to be served warm. Although some like them better warm, quiches at room temperature is also not only acceptable, but sometimes preferred. The time limit on serving room temperature quiches is 1 hour. So keep a good eye on your clock as your party guests sample these tasty tidbits.

Mini Appetizer Quiches
Makes 24
Prep Time: 25 minutes
Cook Time: 20 minutes

Ingredients
1 pkg. refrigerated pie crust
1 large portabello mushroom
8 oz. button mushrooms
1 clove crushed garlic
3 chopped green onions
2 Tbsp. butter
1 Tbsp. olive oil
1/2 cup whipping cream
1 egg
1/4 tsp. salt
1/8 tsp. cayenne pepper
1 cup shredded Swiss cheese
1/2 c. finely chopped ham (optional)


Preparation:
Let pie crusts stand at room temperature for 20 minutes, then gently roll out to 12" circles. Wipe mushrooms with damp cloth and chop in food processor or with chef's knife. Place butter and olive oil in a medium skillet and cook mushrooms over medium heat until all liquid is evaporated and mushrooms are brown and tender.

Preheat oven to 375 degrees. Grease 2 dozen 1 3/4" muffin cups. Using 3" cookie cutter, cut 24 circles from pie crust (12 from each crust), re-rolling crusts if needed. Press into prepared muffin cups. Divide mushrooms evenly among lined cups. In small bowl, combine egg, cream, salt and cayenne pepper and beat well. Pour egg mixture over mushrooms; 2 tsp. per each muffin cup.

Sprinkle each with grated cheese.

To Bake
Bake at 375 degrees for 18-20 minutes or until center of quiches is set. To serve warm, cool 5 minutes before removing from pans.


To Freeze
Cool on wire rack and freeze in single layer until solid. Place in air tight freezer container in single layer.


To Serve
To reheat, place frozen quiches on cookie sheet and bake at 350 degrees for 12-14 minutes until hot.

Read more...

Featured on The Village Voice

November 30, 2009

Check out this article...
It's from The Village Voice.
The National News Site based out of NYC.

They recently wrote an article about me and Freeze Happy.
The title is pretty funny...

"Delaware Artist & Mom Doles Out Chilling Advice"


Read the full article by clicking here.

Read more...
Mini Meatball Recipes Pt. 3

November 23, 2009

Italian Meatball Soup


1 (14 ounce) can beef broth
1 (14 1/2 ounce) can diced tomatoes with onion and garlic

1 1/2 cups water
1/2 teaspoon italian seasoning, crushed
8 ounces frozen italian style cooked meatballs, or your own from the freezer,about 8
1/2 cup small dry pasta, such as ditalini or orzo pasta (elbows are ok)
1 cup loose pack, frozen mixed vegetables
1 tablespoon finely shredded parmesan cheese or grated parmesan cheese


Directions
- Stir together beef broth, undrained tomatoes, the water and Italian seasoning in a large saucepan, bring to boiling.
- Add meatballs, pasta and frozen veggies.
- Return to boiling, reduce heat.
- Simmer covered, about 10 minutes or till pasta and veggies are tender.
- Ladle soup into bowls and sprinkle with cheese.


. . . . . . . . . . . . . . . . . . . . . . . . . . . . . . . . . . . . . . . . . . . . . . . . . . . . . . . .

Chile Verde Meatballs
SERVES 4 -6

1 large fresh onion, minced
2 cloves minced garlic
1 (16 ounce) jar la victoria salsa verde
1/2 cup chicken broth
1 1/2 lbs frozen meatballs
1/2 teaspoon ground cumin
1/2 cup sour cream, for garnish


Directions
- Into a large, heavy pot, add the onion, garlic, salsa verde, broth or beer, and the meatballs.
- Simmer on low for 30 minutes, stirring occasionally; add the ground cumin and simmer for 15 minutes more.
- Serve with sour cream for garnish, along with rice and beans and tortillas.


**Note: you can also make this in your crockpot on low for 4 hours, adding in the cumin in the last 30 minutes.

Read more...

Mini Meatball Recipes Pt.2

November 16, 2009

Hey Frozen-Foodies!
Today we continue on our month long dedication to mini meatballs.
For the recipe to make your own mini meatballs click here.
Then considering using them in the following recipes!


Meatball Subs

I know what you're thinking...who needs a recipe for meatball subs?
You do, because what makes these meatball subs different from all others is the amazing cheesy spread that goes on your subs which makes them absolutely DIVINE!


1 lb frozen meatballs, Italian style
1 loaf bakery Italian bread
1/2 (28 ounce) jar spaghetti sauce
1 cup shredded mozzarella cheese

Spread Recipe
1/2 (8 ounce) package cream cheese, softened
1/4 cup mayonnaise
1/8 teaspoon black pepper
1/2 tablespoon italian seasoning
1/2 dash garlic powder


Directions
- In a large pot combine frozen meatballs and spaghetti sauce.
- Heat over medium until meatballs are heated throughout.
- Meanwhile, mix together cream cheese, mayonnaise, Italian seasoning, pepper, and garlic powder and set aside.
- Slice Italian style bread loaves horizontally with serrated bread knife.
- Cut loaves into three- or four-inch sections to make small sandwiches.
- Spread cream cheese mixture on insides of each sandwiche's tops and bottoms.
- Preheat oven to 350°F.
- When meatballs are heated, spoon onto sandwiches and top with shredded mozzarella cheese.
- Put sandwich tops on and place on a foil-lined baking sheet.
- Bake about 10-15 minutes or until cheese is melted.


**You can always substitute low fat cream cheese and low fat mayo to make this a healtheir dish. The taste is not too different and may not even be noticable.

***Recipe can easily be doubled if needed.

. . . . . . . . . . . . . . . . . . . . . . . . . . . . . . . . . . . . . . . . . . . . . . . . . . . . . . . .


French Onion Meatballs

1 lb. frozen meatballs
1 (12 ounce) jar savory beef gravy
1 (1 ounce) package dry onion soup mix
1 tablespoon dry sherry (optional...no substitution necessary if ommitting)


Directions
- Put meatballs in a slow cooker.
- Mix together the gravy, soup mix, and sherry.
- Pour over meatballs and mix slightly.
- Cover and cook on low setting for 3 1/2 to 4 1/2 hours.

- Serve over egg noodles or along side mashed potatoes.

Read more...

Mini Meatball Recipes Pt. 1

November 9, 2009

Since November is Mini Meatball month and if you read last week's recipe for mini meatballs and made a bunch then you're all set to start putting those meatballs to good use! Here are three recipes to tempt your taste buds!


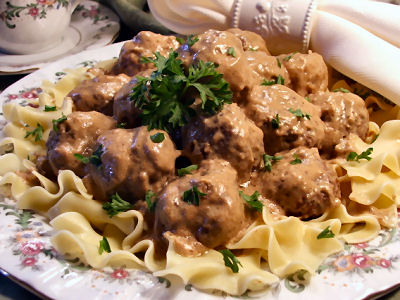
Crock Pot Swedish Meatballs


1/2 to 1lb. frozen meatballs
2 cans Cream of Mushroom soup
1 cup sour cream
1 teaspoon Worcestershire sauce
1/4 cup milk

- Throw meatballs into a crockpot with above ingredients on low for 4 hours. Serve over rice or noodles or with toothpicks as an appetizer.

. . . . . . . . . . . . . . . . . . . . . . . . . . . . . . . . . . . . . . . . . . . . . . . . . . . . . . . .

Sweet & Sour Meatballs


1 (9-10 ounce) jar sweet and sour sauce
1/4 cup packed light brown sugar
3 tablespoons soy sauce
1/2 teaspoon garlic powder
1/2 teaspoon black pepper
2 1/2 lbs frozen meatballs
1 red bell pepper, chopped
1 (20 ounce) can pineapple chunks, drained

Directions
- Place all ingredients in the slow cooker; stir gently then cover with the lid.
- Cook on low setting for 4 to 5 hours, until done.
- Serve directly from the slow cooker over rice.

. . . . . . . . . . . . . . . . . . . . . . . . . . . . . . . . . . . . . . . . . . . . . . . . . . . . . . . .

Mexican Meatball Soup


2 (14 1/2 ounce) cans diced Rotel tomatoes & chilies
2 (14 ounce) cans beef broth
2 (14 ounce) cans chicken broth
16 ounces cooked frozen meatballs (beef) or turkey meatballs
1 medium onion, chopped
1/2 cup fresh cilantro, chopped
1/2 cup long grain rice, uncooked
2 teaspoons dried oregano
salt and pepper, to taste

sour cream, garnish (optional)
shredded cheese, garnish (optional)

Directions
- Chop onions and cilantro. Combine all ingredients in a crock pot.
- Cook for 4 hours on High or cook for 8-9 hours on Low.
- Ladle soup in bowls and garnish with a dollop of sour cream and a sprinkle of shredded cheese.

Read more...

Freezer Favorite: Mini Meatballs

November 1, 2009

These mini meatballs are a favorite. Once you make these, you will never go back to store bought meatballs again...promise! And they have so many uses.

Mini Meatballs


Prep Time: 25 minutes
Cook Time: 15-25 minutes
Yield: 80-90 meatballs

1 large onion, grated
1&1/2 cup fresh grated Parmesan
9 garlic cloves, minced
3 teaspoon salt
3 large eggs
1 teaspoon ground black pepper
3/4 cup dried Italian style bread crumbs
3 pounds ground meat*
1/4 c. ketchup
3/4 c. chopped fresh Italian flat leaf parsley leaves
6 leaves fresh basil, chopped

*We generally make these with a blend of ground turkey and beef. You can choose all turkey, all beef or any combination. These can be very healthy since they are not friend in oil and can be made using 100% lean ground turkey. And they are SO GOOD you'll thank me!


To Prepare

-Add the onion, garlic, egg, bread crumbs, ketchup, parsley, Parmesan, salt and pepper to a large bowl and blend. Mix in the turkey...making sure to NOT over mix. Working the meat too much will make it tough.

- Shape the turkey mixture into 1 inch-diameter meatballs. Lightly spray a teflon baking sheet with cooking spray. Place meatballs on baking sheet.

Note: Do not overcrowd the meatballs on the pan...I get 4 rows across and 6 down on a standard rimmed baking sheet. You can bake two sheets at once, but switch racks halfway through cooking time.

-Bake meatballs on Teflon (dark) cookie sheet at 400* for 15-25 minutes or until internal temperature reaches 160*F. If you like them a bit more browned than they turn out, just stick them under a low broiler until desired brown crust is added (yummm....my favorite part).


To Freeze

- Flash freeze cooked meatballs on a clean and cool cookie sheet lined with a silpat or wax paper.

- Store in ziplock bag in freezer for up to 1 year.


To Serve

Check these posts for just a few ideas of recipes for using your delicious meatballs!
Part I
Part II
Part III


Note: Recipe adapted from a meatball recipe by Giada de Laurentiis

Read more...
November is Mini Meatball Month!!!


This is the very very very first item I made in bulk to freeze. I used this recipe for mini Italian meatballs and made 14 dozen in one day.

My first daughter had just been born early and was staying in the NICU. I was going crazy with worry. We were only permitted to see her for 1 hour each day and I finally decided to fill my freezer with food for when she was able to come home. This was more for my sanity than anything else. A way to fill up my days while she was away.

Check in tomorrow for the recipe and then get ready, because all month long I will be sharing MANY recipes for using your fabulous frozen meatballs.
Autumn is the perfect season to cozy up with something hearty and warm. And it couldn't be easier!!!

Read more...
Healthy Bean Burritos

October 26, 2009

Yes, we all have them. Those frozen brick-like burritos in our freezer. They're so handy for husbands and teenagers to grab in a single serving size and throw into the microwave. But why settle for prepackaged foods when you can keep these on hand? Individual vegetarian burritos are perfect for quelling takeout cravings and eating in a jiffy! ANd you control the ingredients that go into them. Perfection!

Healthy Bean Burritos


3/4 cup rice (brown or white)
2 tablespoons olive oil
2 medium onions, chopped
4 garlic cloves, chopped
1 jalapeno chile, chopped (ribs and seeds removed, for less heat)
1/2 teaspoon ground cumin
Coarse salt and ground pepper
3 tablespoons tomato paste
3 cans (15 ounces each) pinto beans, drained and rinsed
1 bag frozen corn kernels, (10 ounces)
6 scallions, thinly sliced
8 burrito-size flour tortillas, 10 inches each
2 cups (8 ounces) shredded Monterey Jack cheese

To Prepare

- Cook rice according to package instructions; set aside.

- Meanwhile, heat oil in a large saucepan over medium. Add onions, garlic, jalapeno, and cumin; season with salt and pepper. Cook, stirring occasionally, until golden, 10 to 12 minutes. Add tomato paste, and cook, stirring, 1 minute.

- Add beans and 1 1/2 cups water; bring to a boil, reduce heat to medium, and simmer, stirring occasionally, until thickened, 10 to 12 minutes. Add corn; cook to heat through, 2 to 3 minutes. Remove from heat; stir in scallions.

- Heat tortillas according to package instructions; fill with rice, bean mixture, and cheese.

- Assemble: Mound 1/4 cup rice, 3/4 cup bean mixture, and 1/4 cup cheese on one side of tortilla. Fold, and hold in sides. Starting from filled end, holding sides in as you work, tightly roll into a bundle. Place on a baking sheet, seam side down, and prepare remaining burritos.


To Freeze
- wrap individually in plastic and freeze up to 3 months.

To Serve
- take from freezer and remove plastic.
- Wrap with damp paper towel and heat in microwave for 3-4 minutes until heated through.

*recipe and photo from Everyday Foods

Read more...

Reader Question: How I Freeze

October 19, 2009

Here's a reader question from Emily B.

Q: I was wondering when you do freeze meals. Do you make a meal double and freeze the other one, or do you make a week’s worth of meals on a Monday, or how does this work for you? Thank you for your time and the great blog! Emily


A: It can be done many different ways. And it all kind of depends on the amount of freezer space you have.

Last year we lived in a single floor apartment that was very small so when I froze meals I would make two meals...one to eat that night and one to freeze. I would do that weekly and then always eat a freezer meal on Monday nights. That meant a constant rotation of meals through our small freezer and a day off for me at least once a week.

We have now moved to a Townhouse with an attached garage which houses our full size, stand up freezer. Now I have the freedom to spend one entire Saturday assembling meals and have enough for a month's worth. I can also make large batches of cookies, side dishes, meatballs, etc.

Hope that answers your question!

Read more...

Reader Question: Freezing Pizzas

October 12, 2009

Today I wanted to answer a great reader question. Katy B asks...

Q: I wanted to email you to ask about freezing pizzas, so when I checked your site and saw the pizza dough I thought you had read my mind! What I'd like to know though, is if it is possible to create frozen pizzas. I'd like to premake some individual sized pizzas for my son and pop them in the oven - - if it's possible to do that at home, what tips should I be aware of?? Or what's the very most I could freeze together - perhaps just dough with sauce on it or any toppings, but no cheese (to be then added later).


A: The difficulty with freezing entire pizzas is the sauce. You would have to experiment a lot with different sauces. The problem is that tomato sauces have all different amounts of water content based on the tomatoes used. For instance, my hubby and I prefer a very fresh tasting red sauce, but that does not freeze well since fresh tomatoes will expel a lot of water when baked from frozen. So you have to experiment with sauces with a much more pasty base. Where the water content has been reduced prior to freezing by using sauce more resembling tomato paste.

Yes, it can be done, but might require work on your part and the consuming of a lot of watery pizzas. Please let me know if you find one that works!

Read more...

Healthy Pizza Night

October 5, 2009

My husband and I started the South Beach diet a few years back and looked and look for a great whole wheat pizza crust recipe to call our own. Look no further...Martha Stewart delivers with this easy and healthy recipe that even your kids will love. With this recipe you can freeze balls of dough or, even more convenient, shells. With one batch of dough, you have enough to make two large pizza shells or eight individual ones.

HEALTHY WHOLE WHEAT PIZZA DOUGH


Ingredients
1 1/2 cups warm (115 degrees) water
2 packets (.25 ounce each) active dry yeast
1/4 cup olive oil, plus more for bowl
2 tablespoons sugar
2 teaspoons coarse salt
2 cups all-purpose flour (spooned and leveled), plus more for kneading
2 cups whole-wheat flour (spooned and leveled)


To Prepare
- Place water in a large bowl; sprinkle with yeast. Let stand until foamy, about 5 minutes. Brush another large bowl with oil.
- In bowl with yeast, whisk sugar, oil, and salt. Stir in flours with a wooden spoon until a sticky dough forms. Transfer to oiled bowl; brush top of dough with oil. Cover bowl with plastic wrap; let stand in a warm spot until dough has doubled in size, about 1 hour.
- Turn dough out onto a well-floured surface. With floured hands, knead until smooth, about 15 seconds.


To Freeze & Serve

For 2 large pizzas:
- Divide into two balls. Set balls on a plate (they should not touch); freeze until firm, about 1 hour. Then freeze in a freezer bag up to 3 months. Thaw overnight in refrigerator.

- Preheat oven to 450 degrees. Lightly oil a large baking sheet; set aside.

- On a lightly floured work surface, use a rolling pin and your hands to roll and stretch dough to a 15-by-10-inch oval (if dough becomes too elastic to work with, let rest a few minutes). Transfer to prepared baking sheet.

-Top with sauce and desired ingredients. Bake until crust is golden and cheese is melted, about 20 minutes. Serve immediately.


For 8 personal pizzas:
- Divide each ball of dough into 4 pieces. Using your hands, stretch each piece into a 5-inch disk (if dough becomes too elastic to work with, let it rest a few minutes).

- Freeze shells on two parchment-lined baking sheets. Stack frozen shells between layers of parchment paper. Freeze in a freezer bag up to 3 months.

- Turn a large baking sheet upside down; rub with oil. Spread sauce and desired ingredients on pizza shells. Bake until crusts are golden, 18 to 20 minutes.

Read more...

Grilled Jalapeno Lime Chicken

September 28, 2009

Summer is almost over and it's you last chance to use that grill before the long Winter hits. You know, the longer a meat sits in marinade the more the flavors seep in. So why not make life even easier by freezing meats in marinades for future grilling? Here's a great recipe for a flavorful and zesty chicken which can thaw in the freezer the day before your bar-b-que and be ready to throw on the grill.


12 boneless skinless chicken breasts
1 c. orange juice concentrate
2/3 c. chopped onion
1/2 c. lime juice
1/2 c. honey
1 jalapeno pepper (seeded and diced)
2 tsp. ground cumin
2 tsp. fresh lime peel
1/2 tsp. garlic salt
2 cloves (or 2 tsp.) minced garlic
1 gallon size or 12 sandwich size ziplock freezer bag

To Prepare
- combine all ingredients in gallon size freezer bag. Refrigerate for 4 hours.

To Freeze
- Do NOT cook. Freeze all breasts together or in individual portions.

To Serve
- thaw completely in refrigerator for at least 24 hours before serving.
- grill on bar-b-que, making sure the internal temperature of each breast reaches 165*.
- serve with spanish rice or over a fresh green salad with lime wedges.

Read more...

Happy Birthday to ME! Cake Freezing.

September 21, 2009

Today is my 32nd birthday.
{pause for applause}

And in honor of that I am going to share a fabulous tip for freezing baked cakes.
Yes, a lot of the bakeries do it and here's how to make it successful.


To Freeze
- Bake a cake as you normally would and cool completely (I always use cakemix, but you can bake from scratch if you prefer).
- Cut into layers if desired.
- Wrap each layer tightly in plastic wrap.
- Then stack layers together and wrap tightly into one cake with plastic wrap.
- Label and freeze for up to 4 months.

To Serve
When you're ready to serve simply remove cakes and allow to thaw slightly on kitchen counter. You have no idea how much easier it is to frost a slightly frozen cake! Add filling and frost and then store in refrigerator or on counter until ready to serve.

Another Tip
For an even easier and tasty alternative, before freezing fill layers with real whipping cream, put cake into layers, wrap and freeze. This is like a huge Whoopie Pie and can be eaten still slightly frozen, cool or completely thawed. You can eat it plain, frost it with regular frosting or you can also top with fresh berries or canned fruit pie filling.

This is such a useful trick for church potlucks, unexpected classroom parties and last minute visitors. So bake up a few cakes today and freeze them for later...you'll be glad that you did!

Read more...

Vegetable Chowder

September 14, 2009

Autumn is upon us. For many of us school has started, the air is turning cool and the leaves are beginning to change to beautiful hues of orange and crimson. This is the time of year when my dinner table begs for rich and warm soups. Corn, bell peppers, and green beans give this hearty soup its fresh, summery flavor. This is a great dish for vegetarians or to add to your rotation of family meals.

Vegetable Chowder


Ingredients
3 tablespoons butter
1 large onion, diced (about 2 cups)
2 medium red bell peppers, seeds and ribs removed, diced (2 1/2 cups)
1/2 teaspoon dried thyme
3 cups milk
4 medium baking potatoes (about 2 1/2 pounds), peeled and cut into 3/4-inch cubes
8 ears corn, kernels removed (about 4 cups)
Coarse salt and ground pepper
1 1/2 pounds green beans, ends trimmed, broken into 1-inch pieces (about 6 cups)


To Prepare
- In a Dutch oven or 5-quart pot, melt butter over medium heat. Add onion, bell peppers, and thyme; cook, stirring occasionally, until vegetables are softened, about 5 minutes.
- Add milk, potatoes, and 5 cups water. Bring to a boil; reduce heat, and simmer, covered, until potatoes are almost tender, about 8 minutes. Stir in corn, 1 tablespoon salt, and 1/2 teaspoon pepper. Simmer until corn is tender, about 3 minutes.
- With a slotted spoon, transfer 3 cups of the solids to a blender; puree until smooth. Return to pot; add green beans. Bring to a simmer; cook until beans are not quite tender, 4-5 minutes. Season again with salt.

To Freeze
Cool chowder completely before transferring to airtight plastic containers; leave 1 inch of space at the top. Label and store in refrigerator.

To Serve
Defrost overnight in the refrigerator, then reheat on stove top over low heat (or in microwave).


*recipe & photo from Everyday Foods

Read more...

Freeze-Ahead Lasagna Primavera

September 7, 2009

Get ready for a completely different take on traditional red-sauce lasagna. Your family will enjoy this slight change of pace and you will to.

Freeze-Ahead Lasagna Primavera


Ingredients
1/4 cup olive oil, plus more for foil
1/2 cup all-purpose flour
2 garlic cloves, minced
6 cups whole milk
2 packages (10 ounces each) frozen chopped spinach, thawed and squeezed dry
1 package (10 ounces) frozen peas
1/2 pound carrots (4 to 5), halved lengthwise and thinly sliced
Coarse salt and ground pepper
1 container (15 ounces) part-skim ricotta (about 2 cups)
1 large egg
1 package (9 ounces) no-boil lasagna noodles (12 to 16 noodles)
1 pound part-skim mozzarella, shredded
1 cup grated Parmesan


To Prepare
- Preheat oven to 400 degrees. In a large saucepan, heat oil over medium; add flour and garlic.
- Cook, stirring constantly, 2 to 3 minutes (do not let flour mixture darken); whisk in milk. Bring to a boil; reduce to a simmer, and cook, whisking occasionally, until thickened, 3 to 5 minutes. Add spinach, peas, and carrots; season with salt and pepper. Set sauce aside.
- In a medium bowl, combine ricotta, egg, 1/2 teaspoon salt, and teaspoon pepper.
- In the bottom of a 9-by-13-inch aluminum baking dish, spread a thin layer of vegetable sauce. Layer noodles, half the remaining vegetable sauce, another noodles, half the ricotta mixture, half the mozzarella, and half the Parmesan; repeat.

To Freeze
- Cover dish with aluminum foil and freeze (do not cook first) .

To Serve
- Thaw completely in refridgerator.
- Bake 45 minutes, uncover, and bake until bubbling and browned, about 20 minutes more. Let cool 10 to 15 minutes before serving.


*photo and recipe from Everyday Foods

Read more...

Vegetable Enchiladas

August 24, 2009

Get a freezable Mexican meal rolling in no time with a no-cook filling and a sauce made from pantry ingredients. Jack cheese and a combination of black beans and corn tortillas give this meatless dish complete protein.

Vegetable Enchiladas


Ingredients

2 tablespoons olive oil, plus more for baking dishes
2 teaspoons ground cumin
1/4 cup all-purpose flour (spooned and leveled)
1/4 cup tomato paste
1 can (14 1/2 ounces) reduced-sodium vegetable broth
Coarse salt and ground pepper
3 cups grated pepper Jack cheese (12 ounces)
1 can (15 ounces) black beans, rinsed and drained
1 box (10 ounces) frozen chopped spinach, thawed and squeezed dry
1 box (10 ounces) frozen corn kernels, thawed
16 corn tortillas (6-inch)

To Prepare

- Make sauce: In a medium saucepan, heat oil over medium. Add 1 teaspoon cumin, flour, and tomato paste; cook, whisking, 1 minute. Whisk in broth and 3/4 cup water; bring to a boil. Reduce to a simmer, and cook until slightly thickened, 5 to 8 minutes. Season with salt and pepper, and set aside.

- Make filling: In a large bowl, combine 2 cups cheese, beans, spinach, corn, scallion whites, and remaining 1 teaspoon cumin; season with salt and pepper.

- Lightly oil two 8-inch square aluminum baking dishes; set aside. Stack tortillas, and wrap in damp paper towels; microwave on high for 1 minute. Or stack and wrap in aluminum foil, and heat in oven for 5 to 10 minutes. Top each tortilla with a heaping 1/3 cup of filling; roll up tightly and arrange, seam side down, in prepared baking dishes.

- Dividing evenly, sprinkle enchiladas with remaining 1 cup cheese.

To Freeze

Cover baking dishes with plastic wrap and then aluminum foil. Place sauce in an airtight container. Freeze enchiladas and sauce for up to 2 months.


To Serve
- Thaw sauce in refrigerator overnight (or microwave on high 2 minutes, stirring once halfway through). Preheat oven to 400 degrees. Remove foil and plastic wrap from baking dishes, and pour sauce over enchiladas; cover with foil.

- Bake 30 minutes; remove foil, and bake until bubbly, about 15 minutes more. Cool 5 minutes before serving.


*recipe and photo from Everyday Food

Read more...

Crock Pot : Creamy Italian Chicken

August 17, 2009

As you know, I think freezers are a staple of quick and easy cooking. But let's talk about the other champion of stress free cooking...the crock pot (AKA slow cooker). If only there was a way to combine the two? Hmmmm......

But there is! And it's easy as pie. With recipes like this one, you can combine ingredients ahead of time and freeze. Then thaw in freezer overnight and pop into your slow cooker in the morning. You'll come home from work and be ready for the easiest and tastiest meal around!

Creamy Italian Chicken
3 pounds of boneless skinless breasts
1 stick (or 1/2 c) butter, cut into 1" cubes
1 pkg. dry Italian salad dressing
1 can condensed cream of chicken soup
8 ounces cream cheese, cut in 1" cubes
1 tablespoon minced onion


To Freeze
- Place all ingredients into a gallon ziplock bag. Label and freeze.

To Cook
- Thaw completely in refrigerator
- Cover and cook on low for 6 – 7 hours.

To Serve
- Serve over *rice or pasta.


Healthy Additions:
- Add frozen or fresh brocolli flourettes 45 minutes before finished cook time.
- Add frozen peas 10 minutes before finished cook time.
- Add 10 oz frozen spinach (that has been thawed and squeezed dry) 10 minutes before finished cook time.

*Click to read recipe for pre-cooking and freezing rice.
.
.

Read more...

i'm baaaaack!

August 11, 2009

After almost 3 weeks without internet connection I am back online.
It's interesting how dependant I have become.
Sometimes I get all romantic about the Amish and claim I would want to live like them?
Not anymore.


This time without internet almost killed me.
Earlier today I dimmed the lights and slow-danced around the living room with my new modem to Mariah Carey's "Can't Live...if Living is Without You."

Hello Blogging.
Hello Facebook.
Hello Twitter.
Hello The Scrap Review.
Hello online friends.
Hello Google Reader.
Hello Freeze Happy.
May we never be apart again.

Recipes resume this coming Monday.
.

Read more...

Freezing Eggs

July 13, 2009

Whew!
Sorry I took a little Summer hiatus.
We had family visiting in town as well as my college roommate and
our lives have been a whirlwind of fun, family and fireworks.
We are also preparing for our pending move into Amish country in PA.
Hopefully I can get some posts written ahead of time so I won't be absent from
this blog during the move.

Now back to our regularly scheduled programming....

Many people don't realize you can freeze eggs for later use.
But why would you want to freeze eggs?

- You bought too many eggs and they are close to expiring.

- You made a recipe using just egg whites or just egg yolks and don't want to waste the remainder.

- You live far from a grocery store and want to have eggs on hand in case of emergency.


To freeze eggs:

- Crack the egg and beat until just blended, then freeze individually or together.

- Muffin tins work well to freeze them individually, then pop them out and store in a ziploc bag once frozen.

- To use, simply thaw in refrigerator.

- If you froze them together, about 2 tablespoons of the slightly blended egg mixture will equal about one large egg.


*Note: The USDA says you can NOT freeze eggs in the shell.

Read more...

Baked Ziti

June 22, 2009

This is a good, solid make-ahead meal. It's not so fancy that picky eaters will turn up their noses, but complex enough to move beyond your basic spaghetti and meat sauce. This one is definately kid friendly. Vegetarians can omit the beef or can substitute sauteed crimini or portabella mushrooms for a heartier meal.


BEEFY (or NOT) BAKED ZITI (or NOT)

2 pounds ground meat
2 cloves (or 2 tsp.) garlic, minced
2 teaspoons salt
4, 8 oz. cans tomato sauce
2, 8oz. pkg cream cheese
2 cups sour cream
12 green onions, including green part, chopped
16 oz. noodles (rotini, macaroni or ziti)
2 cups mozzarella or cheddar cheese, grated

Directions:
- In a skillet, brown meat. Add garlic, salt and tomato sauce; simmer about 10 minutes.
- Soften cream cheese and blend thoroughly with sour cream. Add green onions and set aside.
- Boil noodles until 3 minutes before packaged directions; drain.
- In 9x13" (or 2, 8x8") aluminum baking pans, layer noodles, cream cheese mixture, and meat sauce. Repeat layers.
- Sprinkle cheese on top.

To Freeze:
- Spray foil with non-stick cooking spray and cover casserole.
- Thaw in refridgerator.

To Serve:
Bake uncovered at 350 for 30 minutes.
.

Read more...

Swiss Steak

June 8, 2009

Swiss Steak is a method of preparing beef, by means of rolling or pounding, and then braising in an oven. The name does not refer to Switzerland, but instead to the process of "swissing", which refers to fabric or other materials being pounded or run through rollers in order to soften it.

Swiss steak is typically made from relatively tough cuts of meat, such as the round, which have been pounded with a tenderizing hammer, or run through a set of bladed rollers to produce so-called "cube steak". The meat is typically coated with flour and other seasonings and served with a thick gravy.

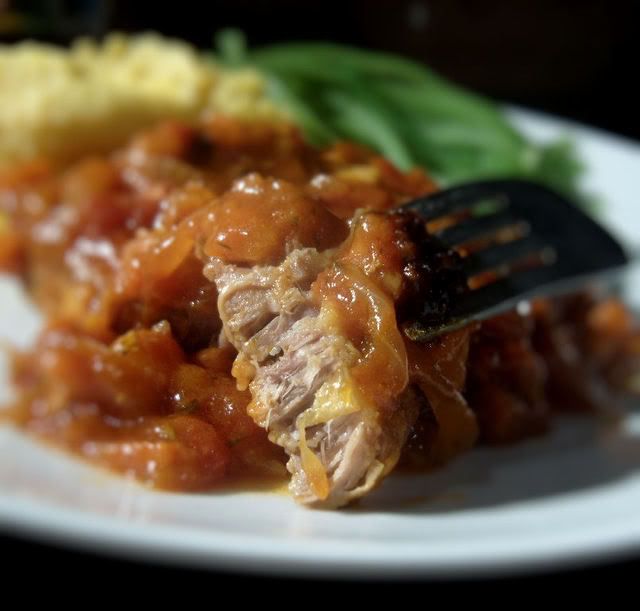
This recipe is great for a last minute meal since it goes straight from freezer to oven, with no defrosting time needed.


Make Ahead Swiss Steak

2 lbs round steak, ½" thick cut
¼ cup flour
½ tsp salt
¼ tsp pepper
2 tbsp oil
½ cup green pepper, minced
1 ¼ cup onion, minced
1 16-oz can tomatoes
1 tsp salt¼ tsp pepper


To Prepare:

Cut steak into 8 individual pieces, using a fork to pierce each side of each piece. In a small bowl, combine flour, ½ tsp salt and ¼ tsp pepper. Top one side of the steak pieces with half this mixture, then use a meat mallet to pound the flour mixture into the steak. Flip the pieces over and repeat.

In large skillet, heat oil and brown meat for about 15 minutes, turning frequently. Reduce heat to a simmer, cover skillet and allow to simmer for 1 hour, adding small amounts of water as needed.

In a separate bowl, combine green pepper, onion, tomatoes, salt and ¼ tsp pepper, mixing well. Add to skillet, cover and simmer for an additional 15 minutes.

To Freeze:

Divide skillet contents in half (including tomato sauce mixture), and split between two, 8x8 freezer containers - foil is best so you can reheat right in container. Allow to cool, seal and label with cooking instructions.

To Reheat and Serve:

Remove from freezer while oven is preheating to 400F. Remove lid and bake for 30-40 minutes or until steak is tender. Serve with rice or noodles.

Read more...

Savory Breakfast Muffins

June 1, 2009

I found this recipe online and tried it out. It was fabulous!
It was originally posted by Lightly Toasted on Recipe Zaar.

I love the idea that you have filling and hot breakfast ready in just seconds for those morning when everybody is rushing out the door. I am going to make a bunch of these (with ham instead of sausage) for ballet mornings at my house when I am prone to grab a bagel sandwich at McDonalds.


Savory Breakfast Muffins

makes 10 jumbo muffins

1 lb chorizo sausage or bulk breakfast sausage
2 cups Bisquick
1 cup cornmeal
3 eggs
1 3/4 cups milk
1/4 c. chopped green or red bell pepper
1/2 c. finely minced onion
1/2 tsp. salt
pepper to taste
1/4 tsp. garlic powder
1 1/2 cups shredded cheddar cheese


To Prepare

1. Line muffin tins with paper liners, and set aside.
2. Fry, crumble and drain sausage. (omit this step if using ham)
3. Preheat oven to 375 degrees.
4. Mix together bisquick, cornmeal, eggs, garlic powder and milk.
5. Add drained sausage, diced peppers, onions and cheese. Stir well. (You may choose to saute the peppers and onion with your sausage for a milder taste).
6. Ladle the filling into the prepared muffin tins, filling almost to top.
7. Bake for 11-15 minutes. Allow to cool completely.


To Freeze

- Store in freezer in a large airtight container. Or place each in a sandwich bag, and then place a dozen in a large ziploc bag.


To Serve

- Microwave on high for approx 90 seconds.

Read more...

Restaurant Crisp Chicken Burritos

May 11, 2009

I don't know how many of you have a Taco Time in close proximity to you, but they have a delightful and not-health-conscious menu item called a Crisp Chicken Burrito. And it is delicious. Well here is my family's version of the recipe and it freezes very well. These are mild and creamy, yet have a slight kick.

Crisp Chicken Burritos

Makes 8

3 -4 boneless skinless chicken breasts, finely diced
1/2 cup finely diced onion
1 small can diced green chilies, drained
1 brick cream cheese, cut into cubes
8 (10 inch) flour tortillas
vegetable oil for frying

To Prepare
- saute chicken cubes and onion in a pan until just cooked through.
- remove from heat and add chilies and cream cheese.
- stir until combined and a thick and creamy sauce has formed.
- place 1/2 c. chicken mixture onto tortilla. Roll tightly, folding in sides. I like mine long and skinny, but you can roll them however you like.
- fry, seam side down, in 1/2" pre-heated cooking oil until tortilla is golden brown on both sides.
- drain on paper towels.
- serve with spanich rice and a green salad.

Freezing Options
- You can either freeze these after frying and reheat in microwave.
- You can also freeze before frying, seam side down on a cookie sheet and transfer to gallon size ziplock to store. Fry in oil when ready to eat until chicken filling is warmed through.

Hint
It helps get a fine dice on the chicken if you cut it while it is not completely thawed. If starting from fresh, throw in freezer for 30 minutes before dicing.
.
.

Read more...

Cheesy Spinach Rice Bake

May 4, 2009

I am trying to feature more side dish and vegetarian dishes here. This recipe can serve as both.

Serve as a side dish to accompany healthy grilled chicken or as its own vegetarian dish. You can definitely play around with the cheeses you use...try pizza blend, Mexican blend or any other cheese your family likes. And what could get kids to eat their spinach like lacing it with various cheeses?

Cheesy Spinach Rice Bake


1 (10 oz.) package frozen spinach (thawed then hand squeezed dry to remove excess moisture)
2 cups cooked white rice or brown rice (use cold rice for this)
1/3 cup melted butter
2 cups shredded medium cheddar cheese
3/4 cup grated Parmesan cheese
1/3 cup finely minced onion
1-2 teaspoon fresh minced garlic
3 large eggs, beaten
3/4 cup milk
1/8 teaspoon cayenne pepper (optional)
1/2 teaspoon fresh ground black pepper
1 tsp. salt

1 cup grated cheddar or mozzarella cheese, for topping


To Prepare
- Generously grease a 11 x 7-inch disposable baking dish.
- In a large bowl, combine all ingredients with a wooden spoon, mixing very well to combine.
- Season with salt, pepper and cayenne to taste.
- Transfer the mixture to the prepared baking dish.
- Sprinkle with Parmesan cheese.

To Freeze
- Warp tightly in plastic wrap and then cover in foil.

To Serve
- thaw over night in refrigerator
- remove wrapping and bake at 350°F for 25-30 minutes or until hot.
.

Read more...

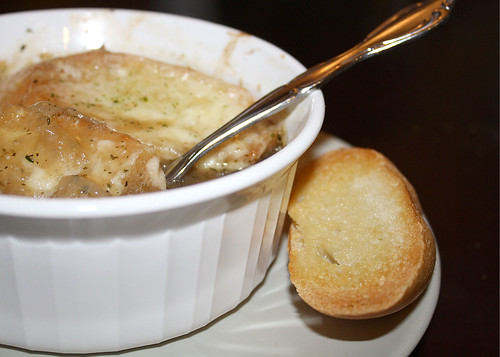
French Onion Soup

April 20, 2009

Soups are such a wonderful meal to freeze.
They thaw and reheat well (okay, not the kind with pasta in them, but that's the exception).

Today my family had a sick-day.
We all felt under the weather for different reasons.
What could heal us? French Onion Soup.
Try it tonight and freeze some for later.

This recipe serves 4-6....so double it!


FRENCH ONION SOUP

3 T. unsalted butter
3 large onions, sliced 1/4" thick
2 cloves (or 2 tsp.) minced garlic
2 T. all purpose flour
1 qt. beef stock
*2&3/4 c. dry white wine (optional)
2 bay leaves
2 springs fresh thyme (or 1 tsp. dried)
1 tsp. salt
pepper to taste

1 baguette
1&1/2 c. grated Gruyere cheese

To Prepare:
- place butter in medium/large pot and melt over medium heat.
- add sliced onions and cook over low heat for 30-45 minutes until lightly caramelized.
- add garlic and flour to pot and cook for 3 minutes.
- add broth, bay leaves, thyme and salt.
- bring to a boil and boil for 2 minutes.
- reduce heat and simmer at least 20-40 minutes. The longer you simmer the better the flavor will become. Remove bay leaves.
- slice baguette and toast under broiler until lightly golden. Set aside.

To Serve:
- ladle soup into oven safe bowls.
- top with 2-3 slices of toasted baguette and top with grated cheese.
- place under broiler until top is bubbly and brown.

To Freeze:
- ladle soup into oven safe bowl. cool completely in refrigerator.
- cover with plastic wrap and freeze for up to 3 months.
- In a separate baggie freeze 2 baguette slices and grated cheese for each bowl.

To Prepare from frozen:
- Allow to thaw in refrigerator.
- microwave on half power, stirring every 2 minutes until heated through.
- top with bread slice and grated cheese.
- broil until top is golden brown and bubbly.


* Please note that when cooking with alcohol that studies have proven that the alcohol does not cook out, even under extremely high temperatures and prolonged cook times. Keep this in mind when serving to children, those with liver problems or those who refrain from alcohol consumption.

For more research information and scientific study results
click here.
For alcohol cooking substitues
click here.
.
.

Read more...

Make Ahead Garlic Bread

April 13, 2009

I have a confession to make.
I am addicted to simple carbs.
This means I could conceivably consume a year's worth of carbs in one meal when pairing great pasta and a loaf of garlic bread. This not only leads to perpetual chubbiness, but also a wide-spread family panic if pasta is made for dinner and no garlic bread is on hand. Hence, this simple recipe.


GARLIC BREAD


Ingredients:
1 loaf French bread
8 Tbsp butter, room temp.
2 cloves (or 2 tsp.) minced garlic
1/2 c. grated Parmesan cheese
2 tbs dried Italian Seasoning (optional)

To Prepare:
- Slice bread lengthwise.
- In a medium bowl, combine the butter, Italian seasoning and garlic. Mix well.
- Spread each cut side of the bread with the butter mixture.
- Sprinkle 1/4 c. Parmesan cheese over each sides of the bread. Put loaf back together, butter sides together.
- Wrap loaf in tin foil. Label and freeze for up to one month.

To Serve:
- Loosen the foil and bake at 400* for 15 minutes.
- Open up the bread so the cut sides are exposed and cook for approximately 15 more minutes.
- Slice and serve.

Single Servings:
If cooking for one or two, slice loaf into 1 inch slices instead of lengthwise. Add butter mixture to each slice and place sheets of wax paper between slices before freezing. Remove just enough servings and bake, butter side up, on baking sheet at 400* for 5-7 minutes.
.

Read more...

Angie's Tuna Casserole

April 6, 2009

Okay, I've never been a Tuna Casserole girl, but my husband loves it and because this came from my good friend Angie, I decided to give it a whirl. I'll be making it this week, so I am trying it out at the same time you are. Let me know what you think!

ANGIE'S TUNA CASSEROLE

1, 16 oz box pasta (like shells, bow ties, or egg noodles)
1/2 c frozen peas
2 cans tuna fish
2 cans cream of mushroom soup
1/4-1/2 c sour cream (if you have-ta use mayo, you can)
dash of cayenne pepper (1/8-1/4 tsp)
a few shakes of garlic salt (1/2 tsp?)
1 c cheddar cheese
1/4 c fresh cilantro
crumpled potato chips

To Prepare:
1. Preheat oven to 350 degrees.
2. Cook pasta according to package directions, include frozen peas. Drain.
3. In a bowl, mix tuna, soup, sour cream, cayenne pepper, garlic salt, cheese, and cilantro. Add pasta mix. Season to taste (additional salt and/or black pepper).
4. Transfer to 9 X 13 casserole dish.


To Freeze:
- Cover tightly with plastic wrap or foil.

To Serve:
- Crumple potato chips by hand and sprinkle evenly over the top.
- Bake at 350 degrees for 30 minutes if thawed (40-50 minutes if frozen), or until heated through.

Read more...

Martha Inspired Mac N' Cheese

March 23, 2009

On a recent move across the country from Utah to the Philadelphia area our little family was most excited about visiting Delilah's in the Reading Terminal Market. Why you ask? Because Oprah rated it the best Macaroni and Cheese in the country. And I think we can all agree that Oprah knows a thing or two about mac n' cheese. It was delicious, and truly, sometimes there's nothing better than ditching the blue box of orange glow mac n' cheese that your kids love and getting into a seriously respectable and adult version that the kids will love too.

So imagine my excitement at finding a freezer recipe from none other than Martha Stewart. I tried it out last week and it was, indeed delicious. I also froze one portion and reheated per her directions and it was also divine! This recipe is from the Everyday Food website. I added a few extras to my cheese sauce. What I added will be indicated with an *.

Macaroni and Cheese


1 pound short pasta, such as cavatappi or macaroni
4 tablespoons butter
1/4 cup all-purpose flour
4 cups milk (don't use less than 2%)
2 tsp. salt
1/8 teaspoon cayenne pepper (optional)
1/8 teaspoon ground nutmeg
1/4 teaspoon ground mustard*
1/4 teaspoon onion powder*
3 cups shredded sharp white cheddar cheese (12 ounces)
1 cup finely grated Parmesan cheese (2 ounces)

3 cups very coarse fresh breadcrumbs
3 tablespoons melted butter


- Cook pasta in a large pot of boiling salted water 1 to 2 minutes less than package instructions.
- Drain, rinse with cool water, and return to pot.

- Meanwhile, heat 4 tablespoons butter in a medium saucepan over medium-high heat.
- Add flour; cook, whisking, 1 minute. Add milk, cayenne, nutmeg, and 2 teaspoons salt; bring to a simmer. Cook, whisking, until mixture is thick enough to coat the back of a spoon, 2 to 3 minutes. Whisk in cheeses until smooth.
- Pour over pasta; toss to coat. Divide among baking dishes (see below).

- Melt 3 tablespoons butter; toss with breadcrumbs. Sprinkle over pasta.


To Freeze:
Cover tightly with plastic wrap; freeze up to 3 months.


To Prepare:
- Preheat oven to 375°. Place frozen dishes on a baking sheet; remove plastic. Cover with foil.
- Bake until bubbling, 60 to 70 minutes for large dishes, 40 to 50 minutes for small.
- Remove foil; continue baking until golden, 5 to 10 minutes more.


Variation:
I added about 2/3 cup of finely chopped cooked ham for a heartier dinner. Serve with steamed broccoli and you're golden!

.

Read more...

REAL Whipped Cream On The Go!

March 9, 2009

This tip is dedicated to my Mother, the whipped cream champion of the world. I don't think Cool Whip passed my lips until I was in my 20's.

FREEZING REAL WHIPPING CREAM
You can freeze real whipping cream and use it to top deserts and hot cocoa and anything else you can think of, without having to whip an entire container of whipping cream every time!

1 cup heavy cream/whipping cream (the WalMart house brand is wonderful)
1 tsp granulated sugar

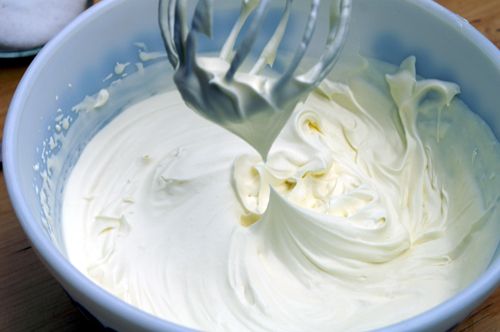
- In a large bowl combine ingredients and beat with hand mixer until it begins to form peaks. (That means when you stop the beaters and lift them straight out of the cream, a peak forms and folds over slightly...as shown below.)


- Line a cookie sheet with wax paper. Dollop whipped cream onto the cookie sheet in single-serving sizes of your preference. If you want to get really fancy and impress your Mother-In-Law, pipe whipped cream out using a pastry bag fitted with a large star tip*.

- Flash freeze on cookie sheet. Then transfer to a ziploc freezer bag or freezer container.

To Serve: You only need a few minutes to allow it to thaw, which you can usually do right on the dessert.


*Please Note: Now, I'm going to tell you this because I love you and we've reached a certain level of trust in our relationship. Please, if you must pipe, don't make the common mistake (spurred on by legions of Semi-Homemade With Sandra Lee fans) of just snipping the edge off of a plastic bag. This results in a very unattractive snake-like appearance which, when piled into a deviled egg or topped on your delightful dessert, looks remarkably like kitty poo. I'm sorry, I just had to say it.


(Don't do this)

Read more...

Chicken Rococo

February 23, 2009

This week's recipe is a good old casserole. I am not prone to casseroles, since I am one of those picky people that doesn't want my corn to touch the gravy on my plate. However, my husband loves a good casserole and he loves brown/wild rice. And so here's a slightly fancy casserole that freezes and reheats well. Enjoy!


Chicken Rococo

Ingredients:
8 boneless, skinless chicken breasts
8 oz. pkg. cream cheese, softened
2 Tbsp. butter
1 onion, finely chopped
1 clove garlic, crushed
1 egg, beaten
2 Tbsp. milk
2 cups dried bread crumbs
1 cup wild rice
1 cup brown rice
1/4 cup butter
1/4 cup olive oil
1 green bell pepper, chopped
1 onion, chopped
1 cup chopped mushrooms
1/4 cup flour
1 cup chicken broth
1-1/2 cups half and half or whole milk

Preparation:
- Flatten chicken breasts between waxed paper. In small saucepan, melt 2 Tbsp. butter and saute onion and garlic until tender. Remove from heat. In small bowl, combine cream cheese with sauteed onion and garlic and blend well. Divide mixture among the chicken breasts. Roll up each piece to hold filling.
- Beat egg with milk. Dip each chicken bundle in egg mixture, then roll in bread crumbs. Chill in refrigerator for 1 hour.
- Meanwhile, cook wild and brown rice in water to cover for 45 minutes. Drain off any remaining water.
- Melt 1/4 cup butter and olive oil in large frying pan. Saute chicken bundles just to brown lightly. Remove chicken and set aside. In oil remaining in pan, cook green peppers, the second onion, and mushrooms until crisp tender. Add flour and cook and stir until bubbly. Add chicken broth and half and half or milk, stirring constantly until thickened and smooth. Combine rice mixture with this sauce and pour into 13x9" baking pan. Top with chicken bundles.
- Bake at 350 degrees for 30-40 minutes until bubbly and chicken bundles are thoroughly cooked.

To Freeze: Bake as directed, then cool completely in the refrigerator. Wrap well, label, and freeze up to 3 months. To thaw and reheat, thaw overnight in refrigerator. Bake at 350 degrees F for 40-45 minutes until thoroughly heated.
.

Read more...

Easy Freezy Quesadillas

February 16, 2009

Mexican food is taking over America and as former residents of the South West we can't get enough. Take a few minutes one afternoon and make stacks of these quesadillas and you can have quick, easy and kid friendly snack all year long! Plus, they are completely customizable so you can have a meal where you eat chicken, your husband eats beef and the kids go with plain cheese.

Easy Freezy Quesadillas


3 packages (10 count) flour tortillas
1 lb. ground beef
1 packet taco seasoning
1 store bought small rotisserie chicken
lots of shredded Mexican cheese blend

Make this like an assembly line...assembling 5 quesadillas at a time. At the end you'll have 15 quesadillas, 5 of each variety. Genius.

Cheese:
- Pre-heat large skillet or griddle.
- Lay out 5 tortillas.
- Top with 1/2 c. shredded cheddar cheese.
- Top with second flour tortilla and fry in pan, one at a time until golden. Allow to cool.
- place each quesadilla into a gallon size freezer bag, placing a piece of wax paper between each quesadilla.
- Make sure to label outside of freezer bag with date and CHEESE Quesadillas.

Beef:
- Saute ground beef until cooked and add taco seasoning packet.
- Lay out 5 tortillas.
- Top with 1/2 c. shredded cheddar cheese.
- Top cheese with 1/2 c. cooked and seasoned taco meat.
- Top with second flour tortilla and fry in pan, one at a time until golden. Allow to cool.
- place each quesadilla into a gallon size freezer bag, placing a piece of wax paper between each quesadilla.
- Make sure to label outside of freezer bag with date and BEEF Quesadillas.


Chicken:
- Cool rotisserie chicken in refrigerator until cool enough to handle.
- Remove meat and cut into 1/2" cubes.
- Lay out 5 tortillas.
- Top with 1/2 c. shredded cheddar cheese.
- Top cheese with 1/2 c. chopped chicken.
- Top with second flour tortilla and fry in pan, one at a time until golden. Allow to cool.
- place each quesadilla into a gallon size freezer bag, placing a piece of wax paper between each quesadilla. - Make sure to label outside of freezer bag with date and CHICKEN Quesadillas.

To Serve:
-Remove desired quesadilla from freezer and cover in slightly damp paper towel. Microwave on high until heated through, about 1 minute.
- Cut into wedges with a rotary pizza cutter.
- Top with salsa, sour cream and guacamole.
- Serve with Mexican Rice and refried beans.
.
.

Read more...

Muffins in a Minute

February 9, 2009

Ready for a great breakfast and brunch recipe?
Here ya go!

Freezer Muffins


3 c. flour
1 T. baking powder
1/2 tsp. baking soda
1/2 tsp. salt
10 Tbsp. unsalted butter, softened (1&1/4 sticks)
1 c. sugar
2 large eggs
1&1/2 c. plain whole milk yogurt

- Whisk or sift together flour baking powder, baking soda and salt.
- In separate bowl beat butter and sugar together until fluffy. Add eggs one at a time. Add yogurt.
- Combine wet and dry ingredients. Add *extras.

To freeze:
- Spray muffin tin with cooking spray. Fill each muffin cup 2/3rds full.
- Wrap tightly in plastic wrap and freeze. Once the raw batter is completely frozen, remove from pan and store in large ziplock bag.

To bake:
- Adjust oven rack to lower middle position.
- Spray muffin tin with cooking spray or line cups with muffin papers.
- Place frozen batter into each cup.
- Bake @ 375* for 35-40 minutes.


*VARIATIONS

Blueberry Muffins: Add 2 c. fresh blueberries (tossed in 1 T. flour) to batter before freezing.
Cranberry-Orange Muffins: Add 1&1/2 c. fresh chopped cranberries and 1 tsp. grated orange zest into batter before freezing.
Lemon-Poppy Seed Muffins: Add 2&1/2 tsp. poppy seed and 1&1/2 grated lemon zest into batter before freezing.

Read more...
Related Posts with Thumbnails

About This Blog

A new recipe will be posted each Monday and, of course, you can always search the archives by category.

The Goal of this blog is not just to give you my recipes, but to teach you which ingredients freeze well, which don't, methods and tips to help you freeze your own recipes...because who knows better what your family likes than you?

Do you only cook organic? Great! Are you a vegetarian? No problem! Make what works for you and save time, money and (let's be honest...stress) while doing it.

The Freeze Happy philosophy has made my life better and I'm pretty sure it can improve yours too.

Legal Stuff

Copyright © 2008-2010 Emilie Ahern. The content on these pages, including text and images are the sole property of the author unless otherwise noted and may not be used or reproduced in any manner without consent. All Rights Reserved.

  © Blogger template On The Road by Ourblogtemplates.com 2009

Back to TOP